Fishing from a kayak or from shore can have its disadvantages when trying to store and keep bait alive.
Unlike most boats, we are restricted on space and how much we can carry.
For shore fisherman, it can be really tough lugging around a large bucket (along with all of your other gear) to your favorite fishing hole, especially if it’s hidden away and takes a bit of walking to get to.
And for kayak anglers, we are very limited on space inside of our small watercraft.
So this blog (and video) will address some of the best ways to keep bait alive without having large buckets and coolers (which add to the amount of weight in your kayak – making it dangerous and also make it tough to paddle).
Catch MORE FISH Or It’s FREE!
Frustrated with inconsistent inshore fishing trips?
Then see if you qualify to become a Salt Strong INSIDER.
First, I would like to point out some important factors to consider to help keep your bait alive, no matter what type of container you may be using.
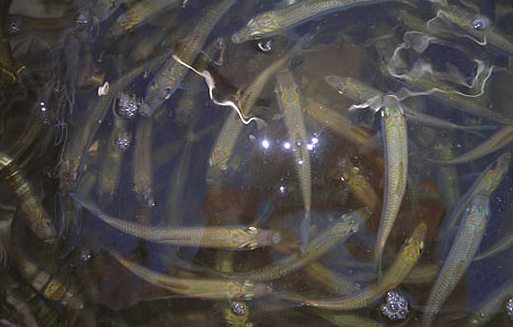
Aerate Your Bait! – Believe it or not, fish need oxygen just like us! However, they acquire it from water. Dissolved oxygen in the water is necessary for fish and/or bait to stay alive. By attaching an aeration system, this will help increase the amount of oxygen in the water. This can be done by using an external pump and air stones, or any type of water circulation device. If you can combine the 2, that is even better (aeration and circulation).
Keep Your Water Cool – You want to maintain a cool water temperature for your bait. Hot or warm water has a lower dissolved oxygen content and will cause your bait to become very lethargic and die. Even if you have an aerator, the dissolved oxygen content depletes much quicker in hot water than cool water. A cool way to keep your water cooled down (pun intended) is to add a frozen bottle of water to your bucket or bait cooler.
Keep Your Water Fresh – You may have nice clean water before you put your bait in, then 30 minutes later you may notice it become murky and have debris floating around inside. Any debris or organic matter inside of your baitwell will also use up oxygen as it decomposes. This will reduce the amount of dissolved oxygen for your bait to use resulting in your bait starting to die off. Every 30 to 60 minutes it is wise to remove old water and add some fresh clean water to your bait container.
Don’t Overload On Bait – You may have heard the term “blacking out your livewell.” This sounds great and all because you’ll have bait to last you a week, but you are actually wasting way more bait than you need. Only keep what you need and don’t overload your bait container. This is especially important when using smaller bait buckets and/or coolers. This takes us back to fish needing oxygen. The more bait you have in a small container, the more oxygen that is being used up and it becomes a survival of the fittest in your bait bucket. In less than 10 minutes you may have a container full of dead bait. Bait can be very easy to catch, so if you need to refill, keep a cast net handy. Not to mention, you’re probably going to be fishing in an area with bait, if not, you may not be catching fish!
Remove Dead Bait – It is important to remove any bait from your bait container that has died. You may see one dead baitfish, and next time you look into your bucket you have 5 dead bait fish. Not only do these floaters or sinkers take up space, they can cause a chain reaction of death in your livewell or bait container from what I have experienced. Once a bait fish dies, it begins to decompose releasing chemicals into the water, such as ammonia, which will start to kill off the rest of your bait. Remove the dead ones and replace some of your water with fresh clean water.
Use a Dip Net – Since our hands can be pretty dirty at times, and you may also have sunblock on them, it is best to use a dip net to get bait out of your baitwell. Any chemicals we may have on our hands will transfer to the water and can kill off your bait.
Catch Your Own Bait – If possible, it can be better to catch your own bait. They will be much more lively. In addition, bait caught using a sabiki rig will stay alive much longer as opposed to catching them in a cast net. The net removes much of the slime coat from the bait and stresses them out much more. Being banged around in a net and on the ground is much more stressful than a tiny hook in the lip.
Those are some important factors to consider to keep your bait alive, so now let’s talk about some of the best items I like to use to store and keep bait alive on my kayak or when fishing from shore.
My Favorite Live Bait Cooler
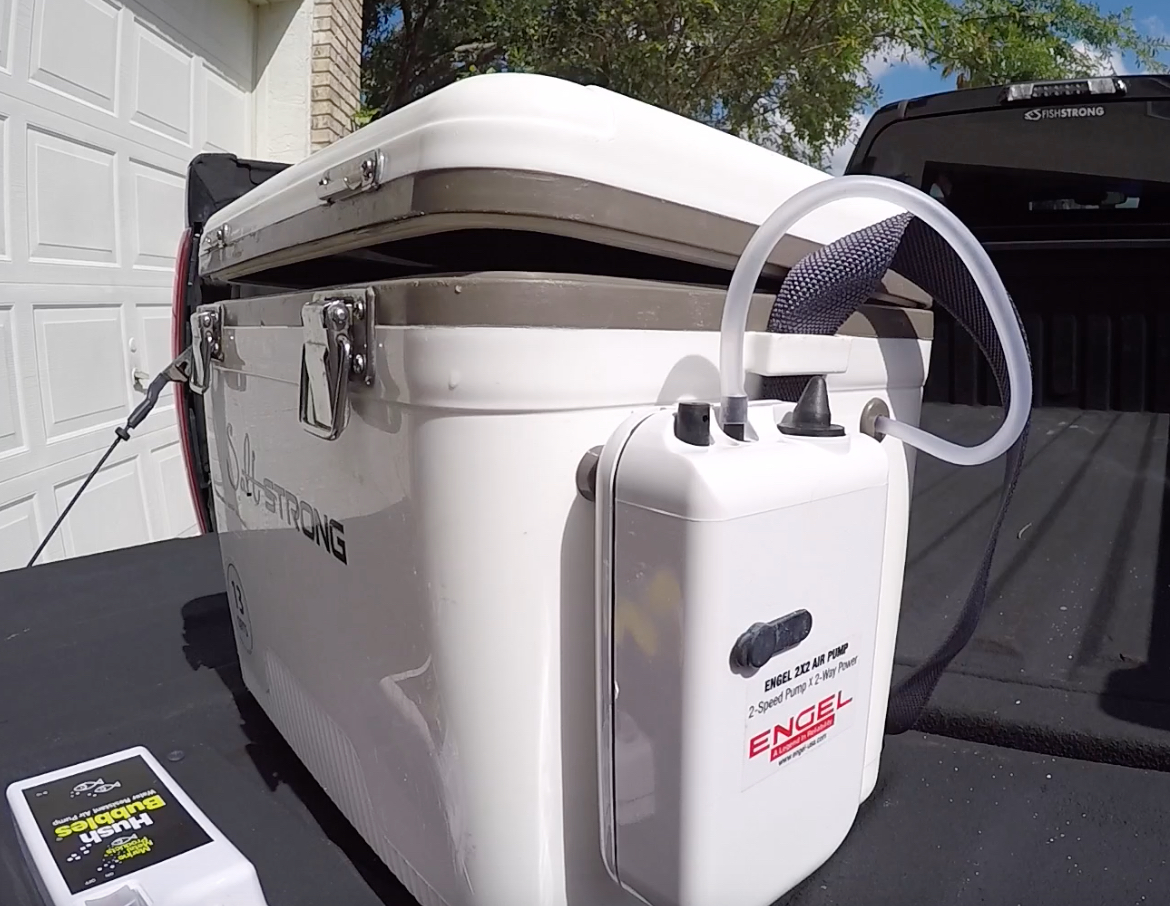
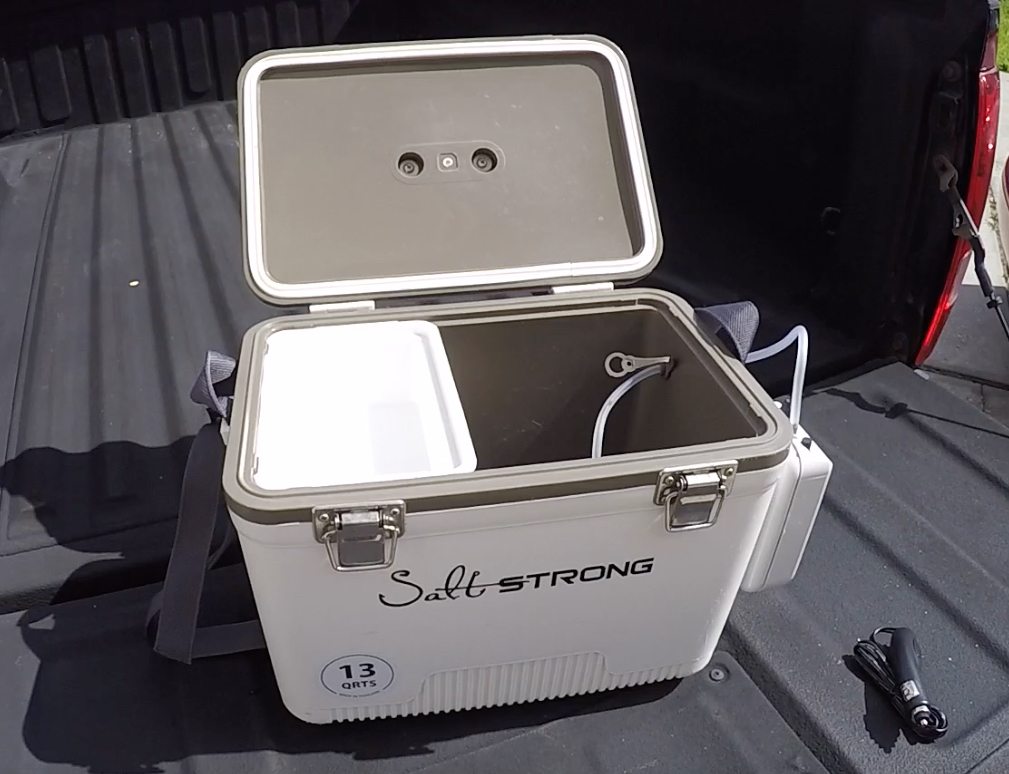
My top choice is a Live Bait Cooler, such as the one made by Engel.
For one, it is a cooler, which helps maintain the water temperature inside.
It also comes with an aerator to help oxygenate the water.
This cooler is also available in a variety of sizes (13qt, 19qt, and 30qt). The 13 quart is a perfect size to carry in a kayak and can be easily slung over your shoulder using the shoulder strap that also comes with it – Great for shore fisherman.
When you are not using this bait cooler as a livewell, it can also serve as a great regular cooler, or a dry box to keep your water sensitive items dry.
Of course, this cooler isn’t cheap, so if you are on a tight budget, then this next option might be best.
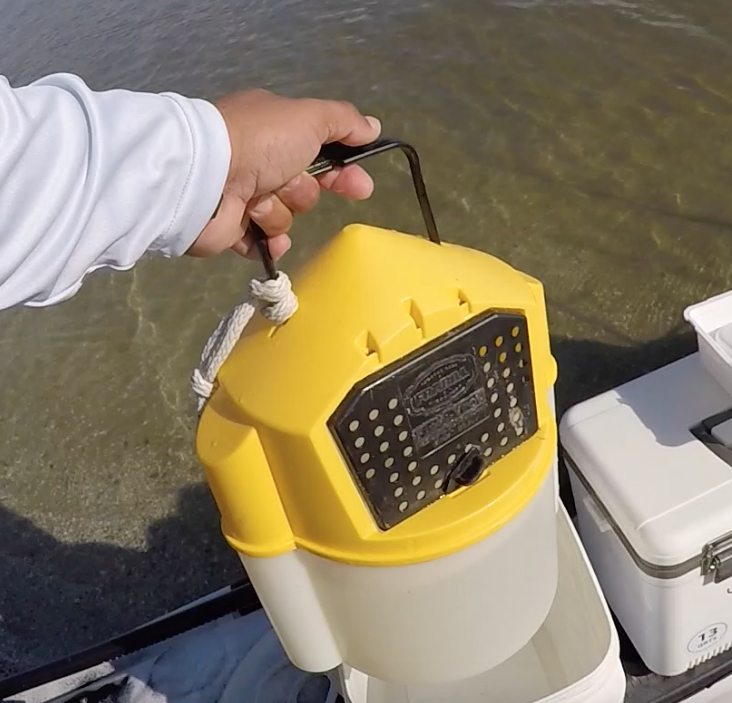
My next top choice for storing bait is a standard Trolling Bait Bucket.
These are very affordable, easy to store, and are great in keeping your bait alive. Since these buckets can be placed in the water, you get a constant supply of fresh water to your bait.
They are also easy to store on your kayak and lightweight to carry if fishing from shore.
The only real downside is that they are fairly small and can’t hold as much bait as one of the coolers can.
Engel Live Bait vs Trolling Bait Bucket [VIDEO]
In the following video, I will be going over these 2 items – The Engel Live Bait Cooler and the Trolling Bucket.
Sign up for FREE to receive the latest saltwater fishing videos, tutorials, product reviews, and fishing product discounts!
P.S. – If you think your friends or fishing networks would like to see this, please Tag them or Share this with them. You Rock! Pa-POW!
Are you into kayak fishing?
Perhaps thinking about upgrading your kayak or accessories?
Or perhaps you are just starting to explore fishing from a kayak and want to make sure you don’t buy something you don’t need.
Well, you came to the right blog.
Introducing the ULTIMATE guide to buying a fishing kayak.
We’ve had a lot of questions from the Salt Strong audience about buying kayaks for fishing (in particular, saltwater inshore fishing).
Questions such as:
What’s the best type of fishing kayak?
What accessories do I need on my kayak?
How to select the best paddle for kayak fishing?
What kind of anchor do I need for my kayak?
The biggest MISTAKES anglers make when buying a kayak.
So in this article, we’ll cover all of that (plus some).
But first, let’s cover the basics.
What Is A Fishing Kayak?
By Tony Acevedo
Guess what?
Fishermen were catching fish from kayaks way before we were born!
Fishing kayaks date all the way back to the early Eskimos and Native American tribes.
What is interesting is that they were originally used for hunting due to their stealth nature, and then people realized how ideal they were for fishing.
In modern days, hunting and fishing from kayaks has been looked at by some type of “extreme” means of performing these tasks, but in reality, our ancestors did this on a daily basis. Not until recently has the method of kayak fishing taken the fishing industry by storm.
The kayak fishing industry has exploded due to the following reasons:
kayaks are affordable
lightweight
easy to store and transport
highly effective to fish out of
super quiet to sneak up on fish
no gas
no batteries
no maintenance
no payments
Note that although a few brands control a big chunk of the kayak market, here isn’t necessarily a branded “Inshore Fishing Kayak”.
Pretty much all kayaks are capable of being customized to your own needs for effectively fishing inshore waters.
Let’s go ahead and take a look at some key factors when choosing a kayak for fishing.
Types of Fishing Kayaks
When choosing a kayak to fish from, the first consideration is what type of kayak do I choose.
Here are the main options you will have:
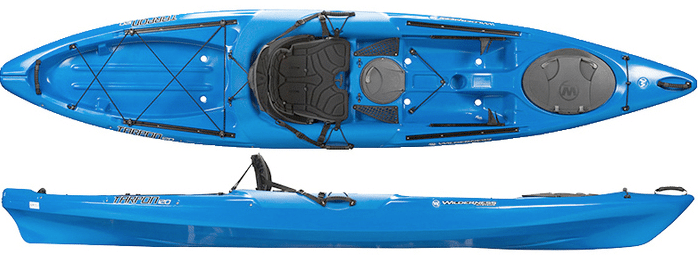
Sit-on-top Kayaks
Sit-in Kayaks
Sit-on-top kayaks are going to be your #1 choice for fishing for the following reasons:
They are easier to get in and out of pretty much in every instance:
when launching your kayak
if you happen to fall out…
or when the need arises to get out and stretch
They are self-bailing, which means when water gets in, it goes right back out and keeps you from flooding.
You sit higher, allowing for a better view of the water
Many seating options for your comfort
More storage options and access to your gear
Ability to stand up
Easy to add accessories and customize
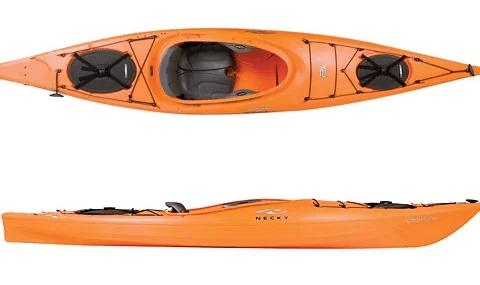
Sit-in kayaks are NOT very fisherman friendly for the following reasons:
Can be difficult to get in and out of
Prone to flooding – when water gets in, it has nowhere to go
You have a very low vantage point sitting below the surface of the water
Not as easy to customize to fit your needs
Even though sit-in kayaks aren’t the best option for kayak fishing, they are still a means of getting you mobile on the water.
They are also cheaper than the sit-on-tops.
So if this is all you can get away with, then by all means, go for it! This is the original kayak style and our ancestors had no issues with hunting and fishing from them.
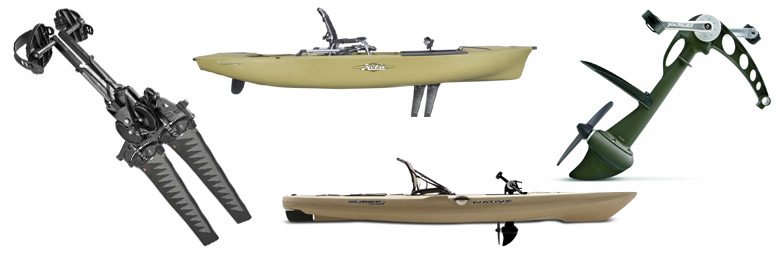
Pedal-Drive Kayaks
There is one more style of kayak that has become very popular for anglers called the pedal drive kayak.
These kayaks are propelled using your legs to “pedal” which will either turn a propeller underneath the kayak, or move fins underneath the kayak.
These are all sit on top styles of kayaks but also have their own pros and cons, so let’s go ahead and take a look at these.
The Pros:
Hands-free operation (aside from controlling the rudder with one hand for turning)
Ability to cover more water and distance
More comfort for those with back or shoulder/arm issues
Forward and reverse capabilities (useful for trolling, fishing in current, fighting large fish)
Mostly all are capable of standing up in due to their width and stability
The Cons:
Expensive – Prices range from $1800 to more than $3000
Heavy – Most paddle kayaks range from 40-80lbs, whereas pedal drive kayaks can start at 100lbs and up, not including gear
Not very shallow water friendly. If fishing in a foot or less of water (some need more clearance) you will have to pull the pedal system up and use your paddle. This can be a burden especially with the kayak being heavy and bulky. This leads to them not being very paddle friendly as well.
So when choosing a kayak to fish inshore, take the above factors into consideration, and also keep in mind the following:
Length – you will want a kayak no shorter than 10ft – longer kayaks track better (ride straight)
Width – the wider the kayak, the more stable it will be. However, you will lose speed.
Weight Capacity – Choose a kayak with a weight capacity that is at least 100lbs more than your own body weight and the weight of all your gear combined
Don’t purchase something you can’t handle. Factor in how you will be transporting and storing your kayak.
Last but not least, TRY BEFORE YOU BUY.
You don’t purchase a car or boat without testing it out first, right? Same is true for kayaks as they are not all created equal.
Note: Most retailers will not accept returns of used kayaks either.
On the plus side, kayaks retain their value very well and can be easily sold online to get back most, if not all, of your money.
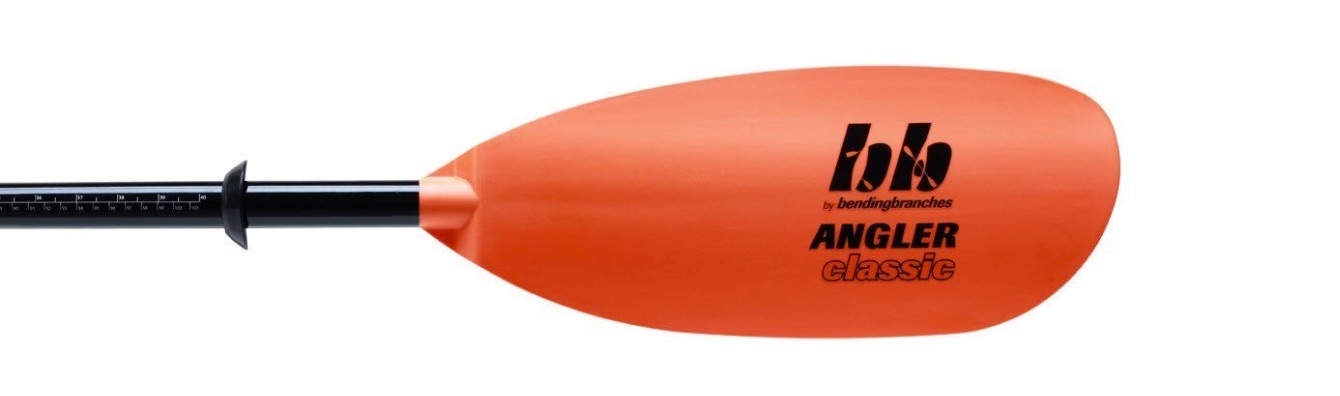
How To Select The Best Kayak Paddle
When choosing a kayak paddle, there are TWO BIG factors that you must be aware of:
Length of the paddle
Weight of the paddle.
Here are some simple kayak paddle rules:
If your kayak paddle is too long, you will find yourself zig-zagging as you paddle.
If it is too short, you will find yourself having to reach to put the blade in the water.
If it’s too heavy, you aren’t going to be able to paddle as far or as long as you want
You may also tend to hit your knuckles on the sides of your kayak if your paddle is too short.
The general rule of thumb when choosing a paddle for kayak fishing is the wider your kayak is, the longer the paddle will have to be. Their sizes are measured in centimeters and range from 210cm – 260cm.
Here is a standard chart that can assist you in choosing the proper length paddle.
Of course the taller you are, go with the longer paddle for the given kayak width.
If your kayak paddle is heavy, you will quickly fatigue yourself on the water, and can also injure yourself.
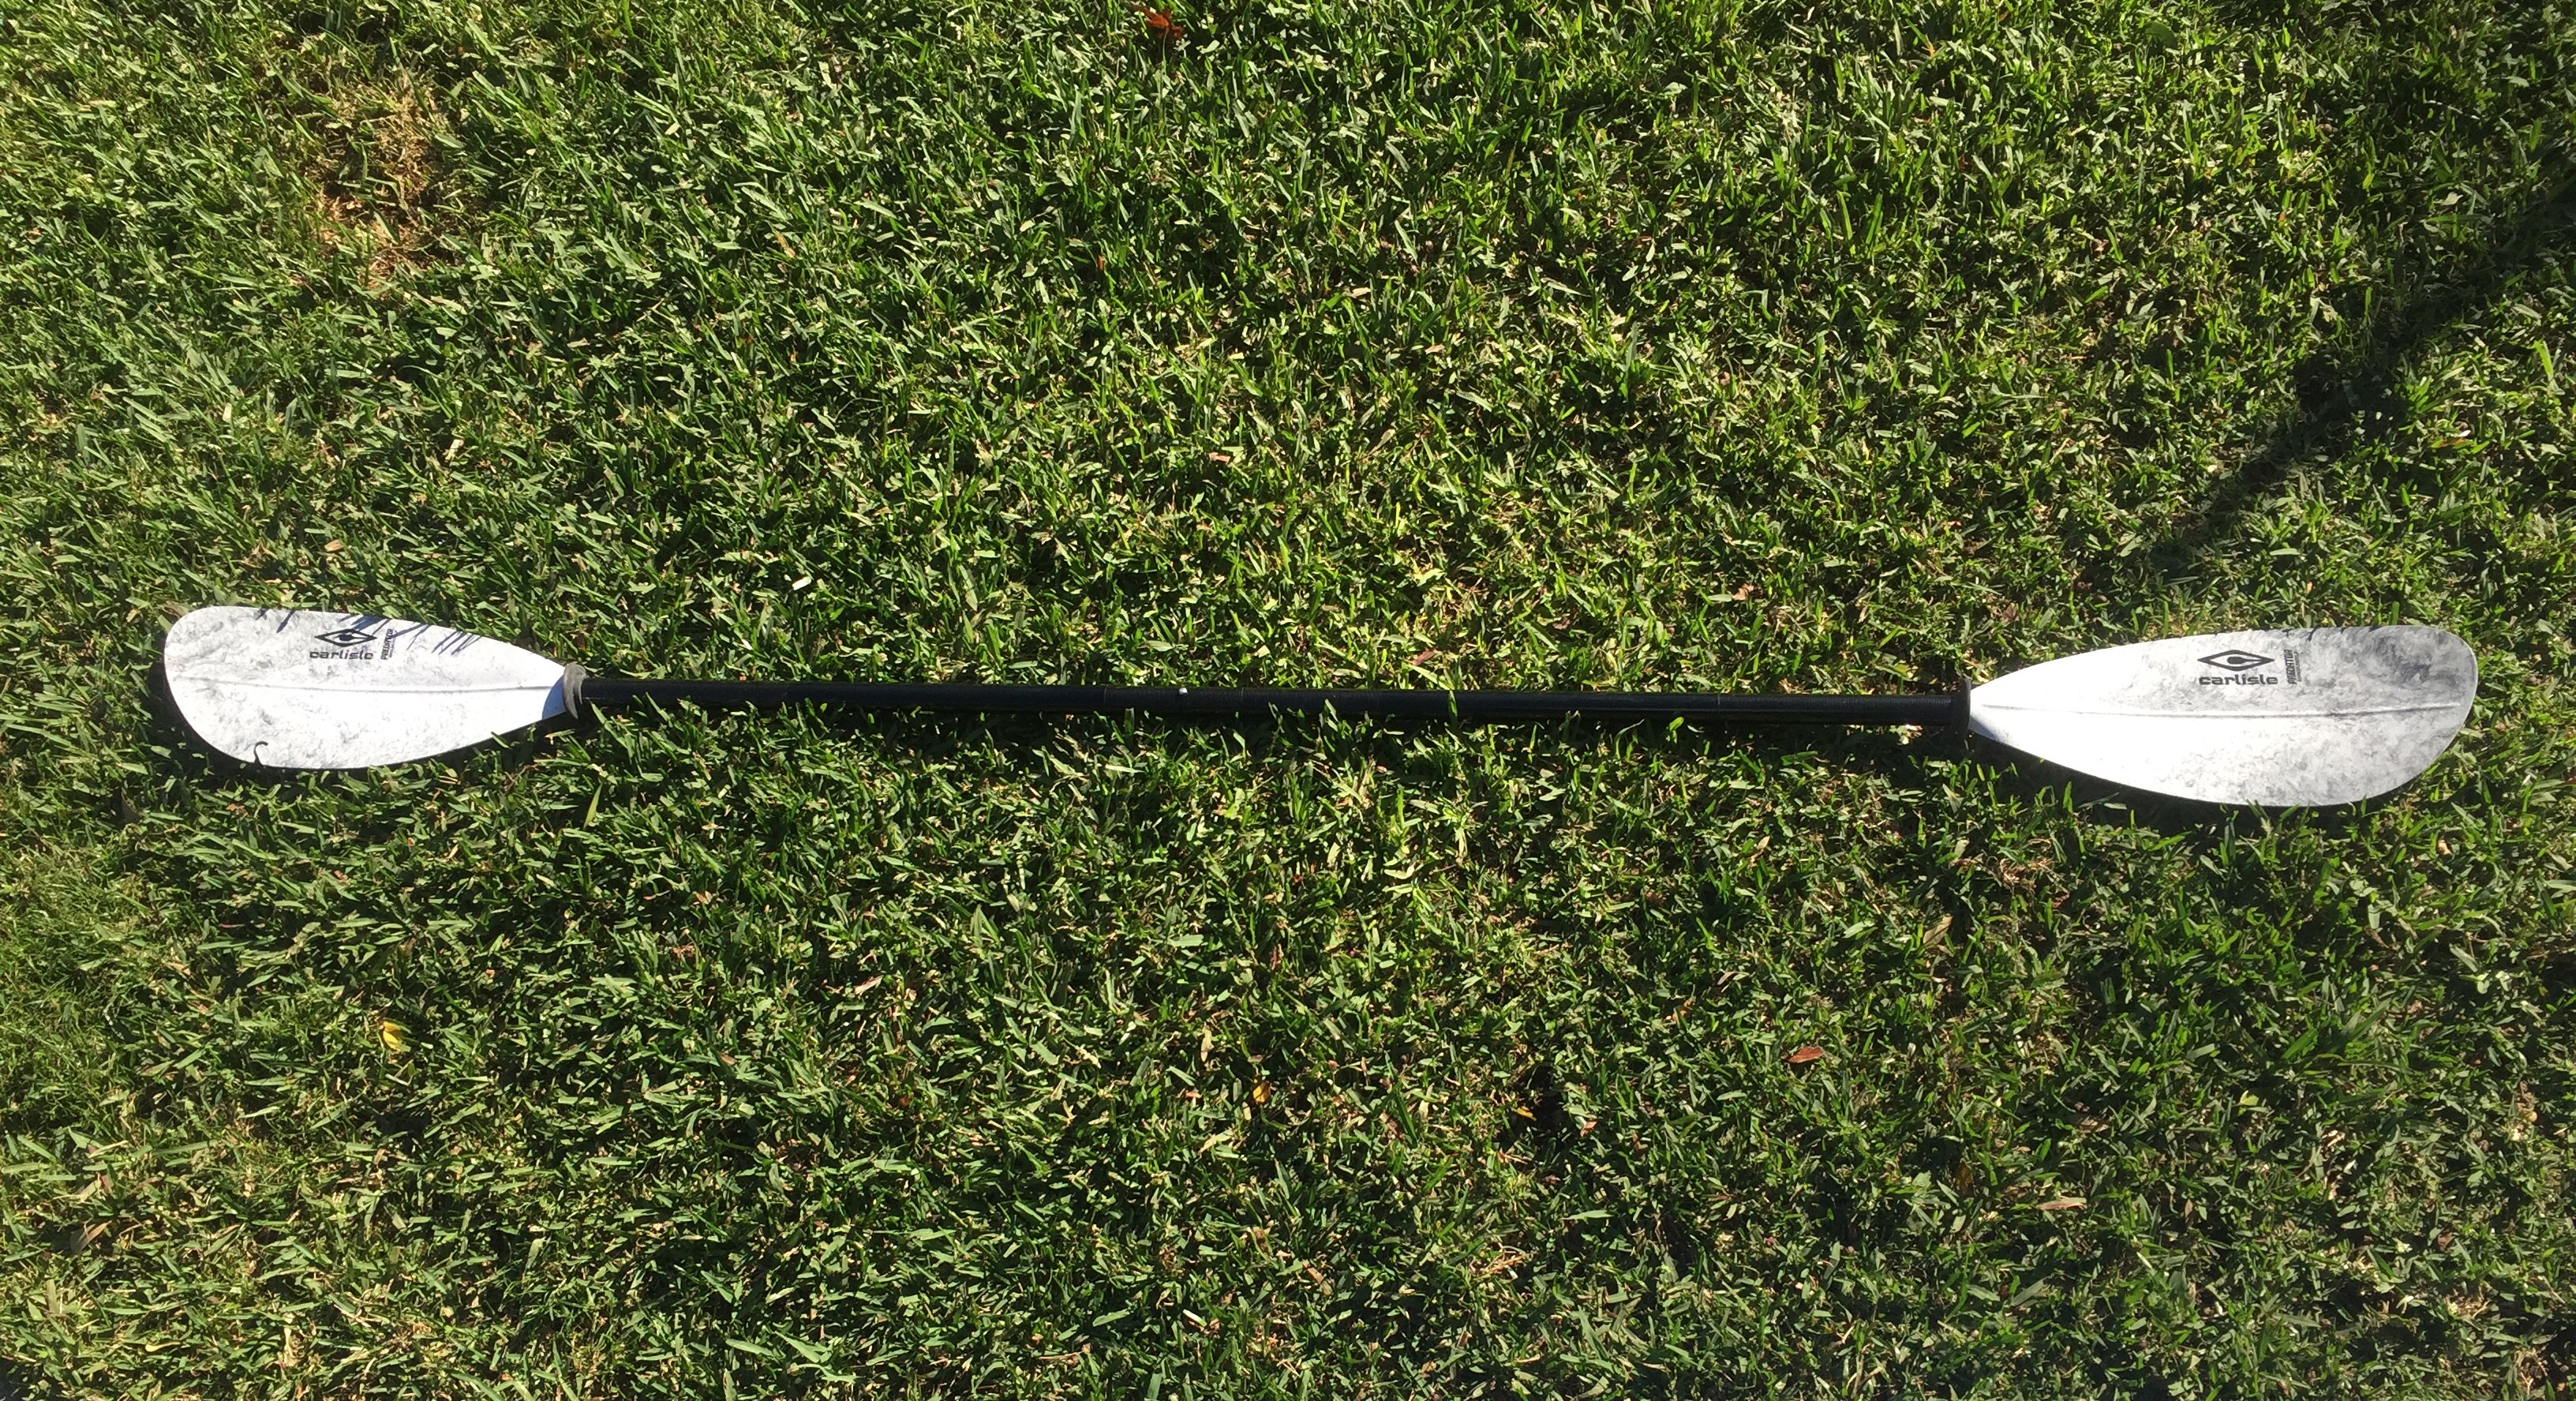
The most affordable and lightweight paddle you can purchase would be an all fiberglass paddle which can range from around $60 – $100.
However, I do NOT recommend going cheap on your paddle!
Your paddle is your means of getting back home at the end of the day. You wouldn’t purposely go cheap on a boat motor, so don’t do it with your paddle.
Notes on kayak paddles:
In addition to fiberglass paddles, there are also paddles made of carbon fiber, which are the lightest on the market. They also carry a pretty big price tag ranging from $200 to nearly $500. As with most price ranges, the higher the price the better the quality.
Here is a standard fiberglass paddle
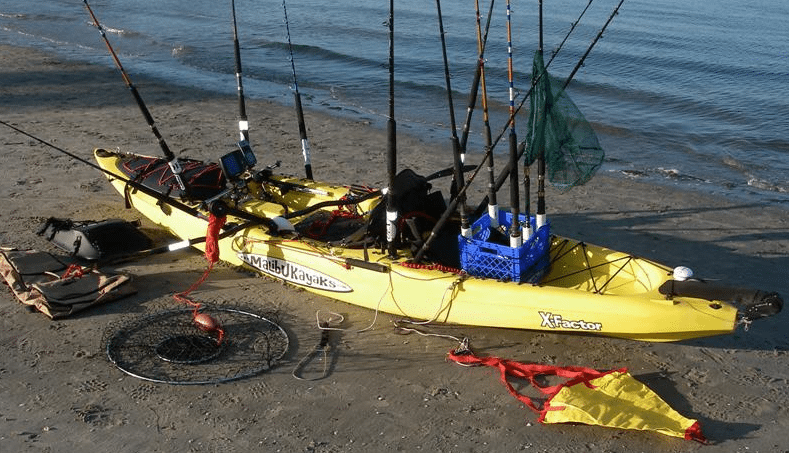
Accessories for Inshore Fishing Kayaks
Today, there is pretty much an endless amount of different accessories out there to outfit your kayak for fishing.
You may see some kayaks decked out with multiple rod holders, fancy lights, and all sorts of gear that can actually end up being more of a distraction and space invader than anything else.
Accessories aren’t just limited to what you would attach to your kayak, but what you would need for a productive day on the water.
My advice: Keep it as simple as possible, yet effective.
The following are some of the top accessories to have for an effective inshore fishing kayak:
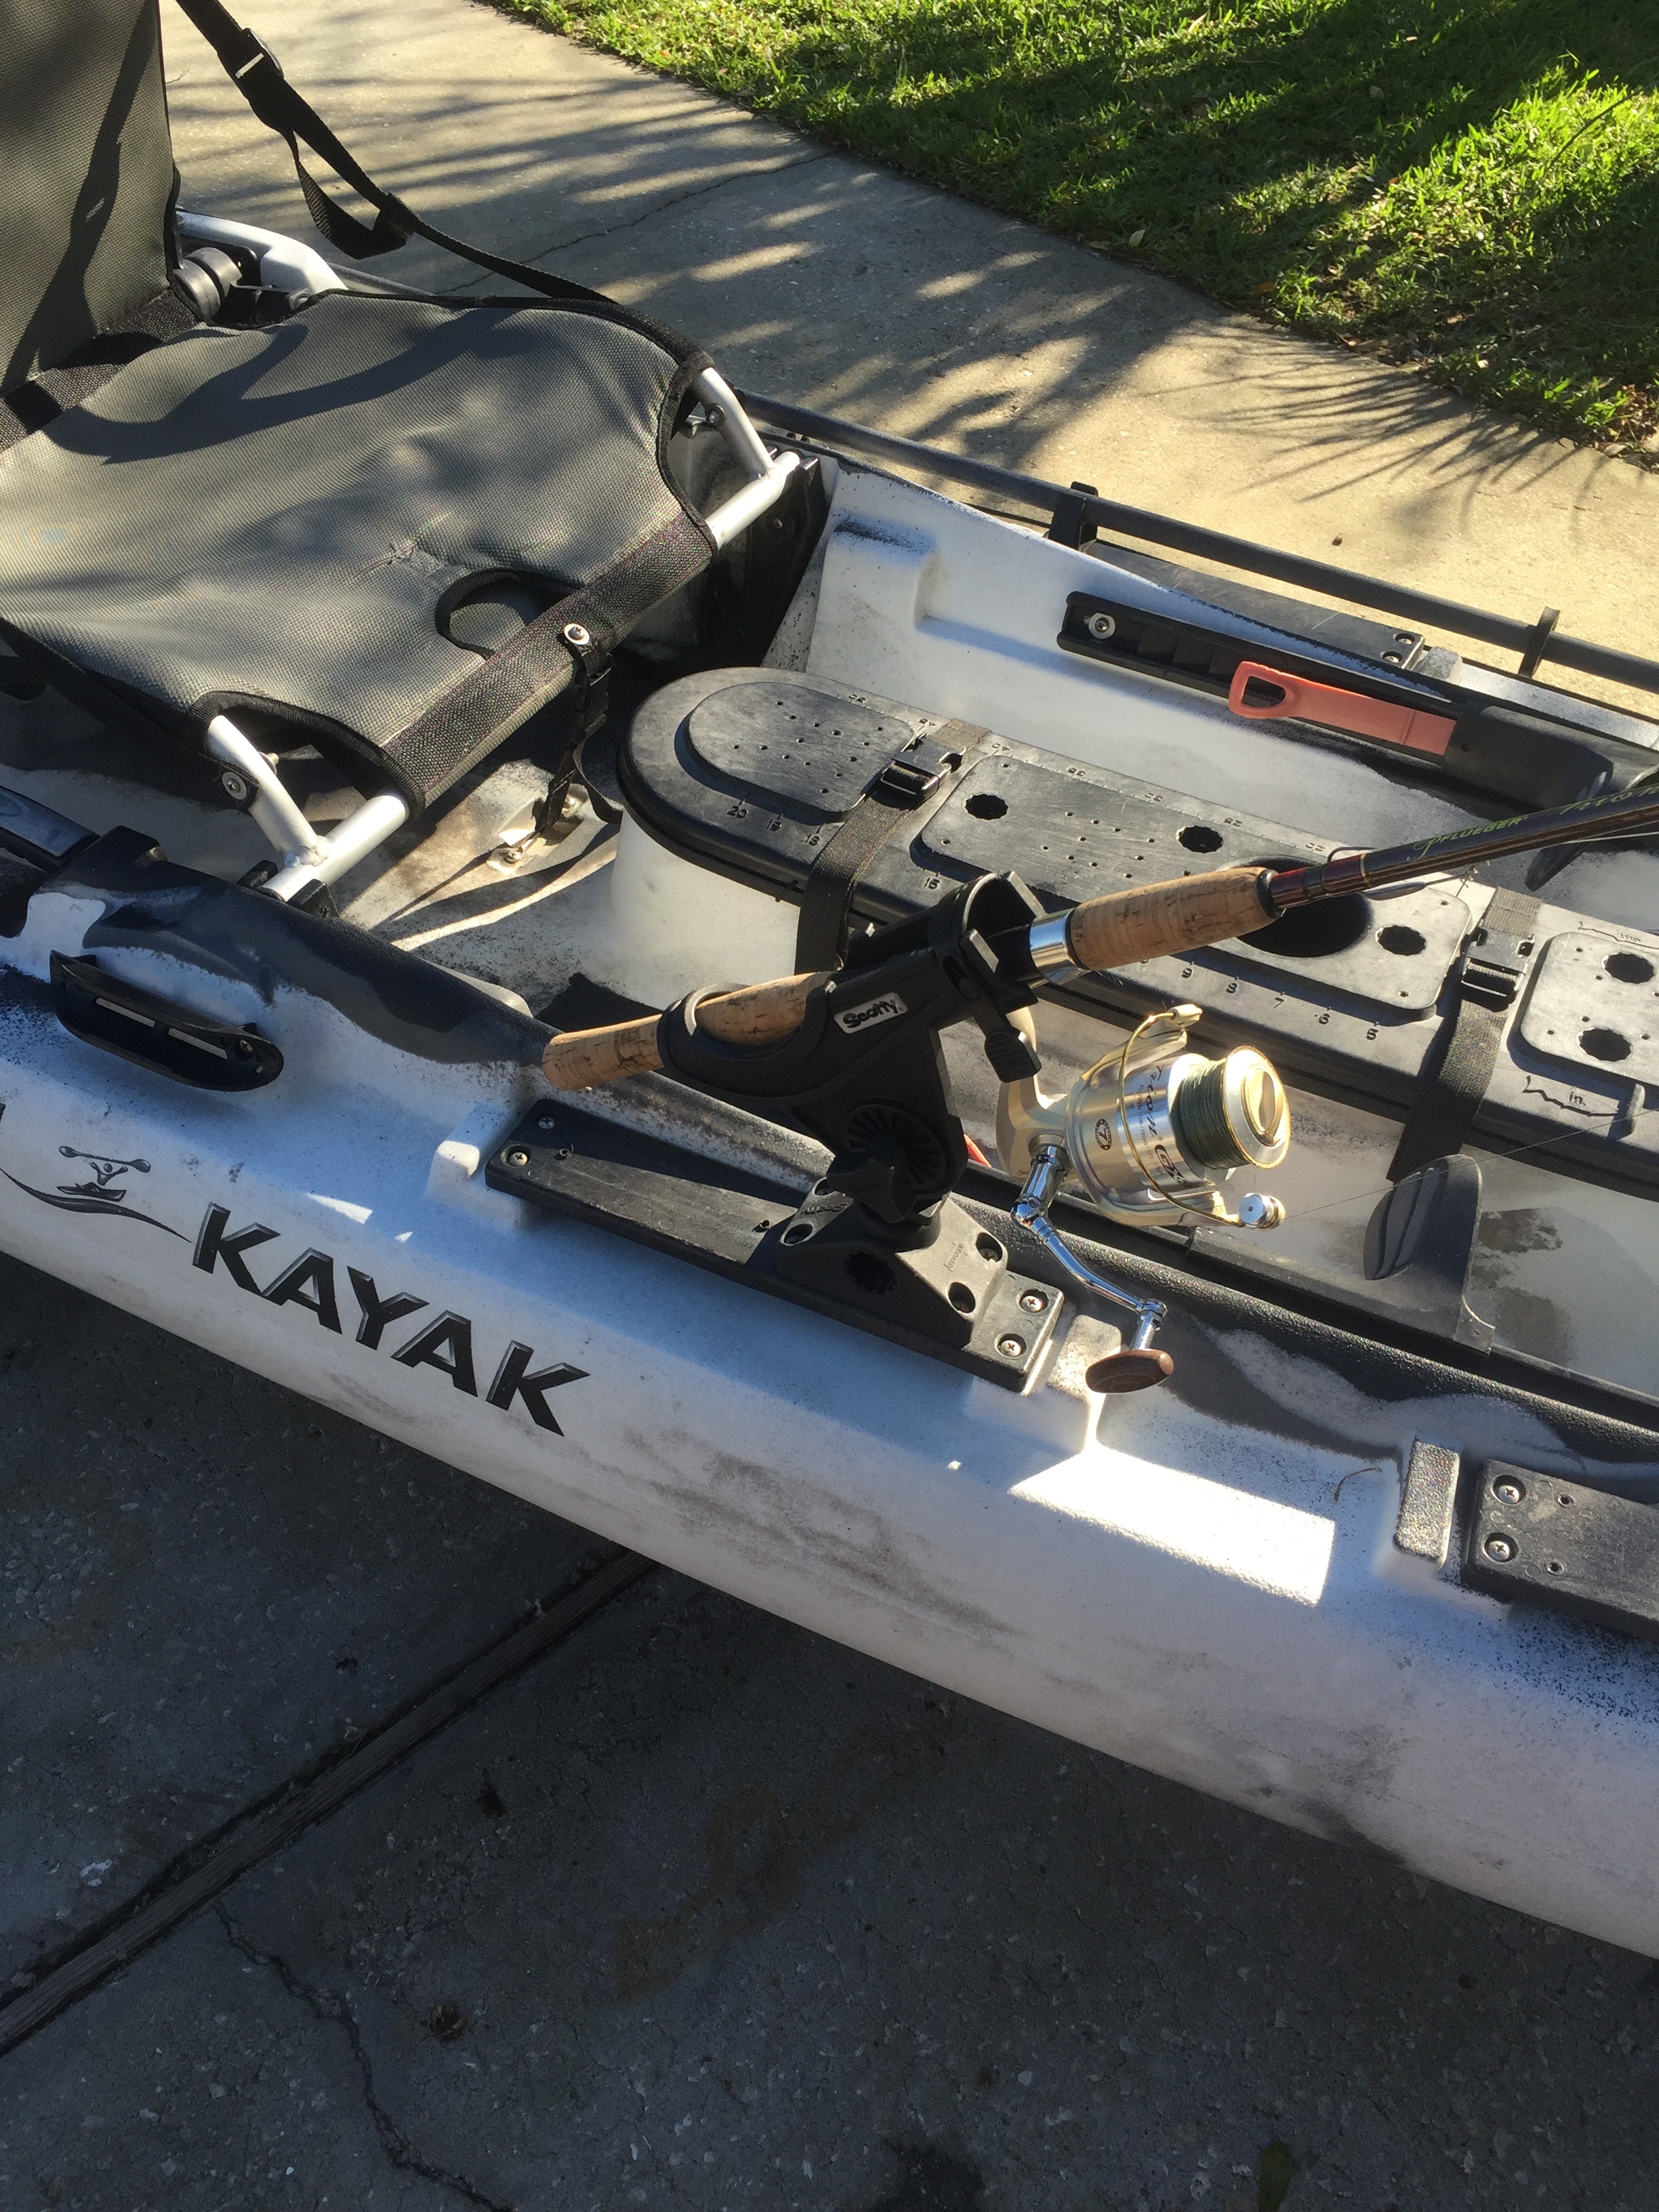
Rod holder mounted in front of you – this puts your rod in an easily accessible location, and also makes it easier for you when de-hooking fish, tying knots, etc.
It’s critical to have a rod holder right in front of you in the kayak
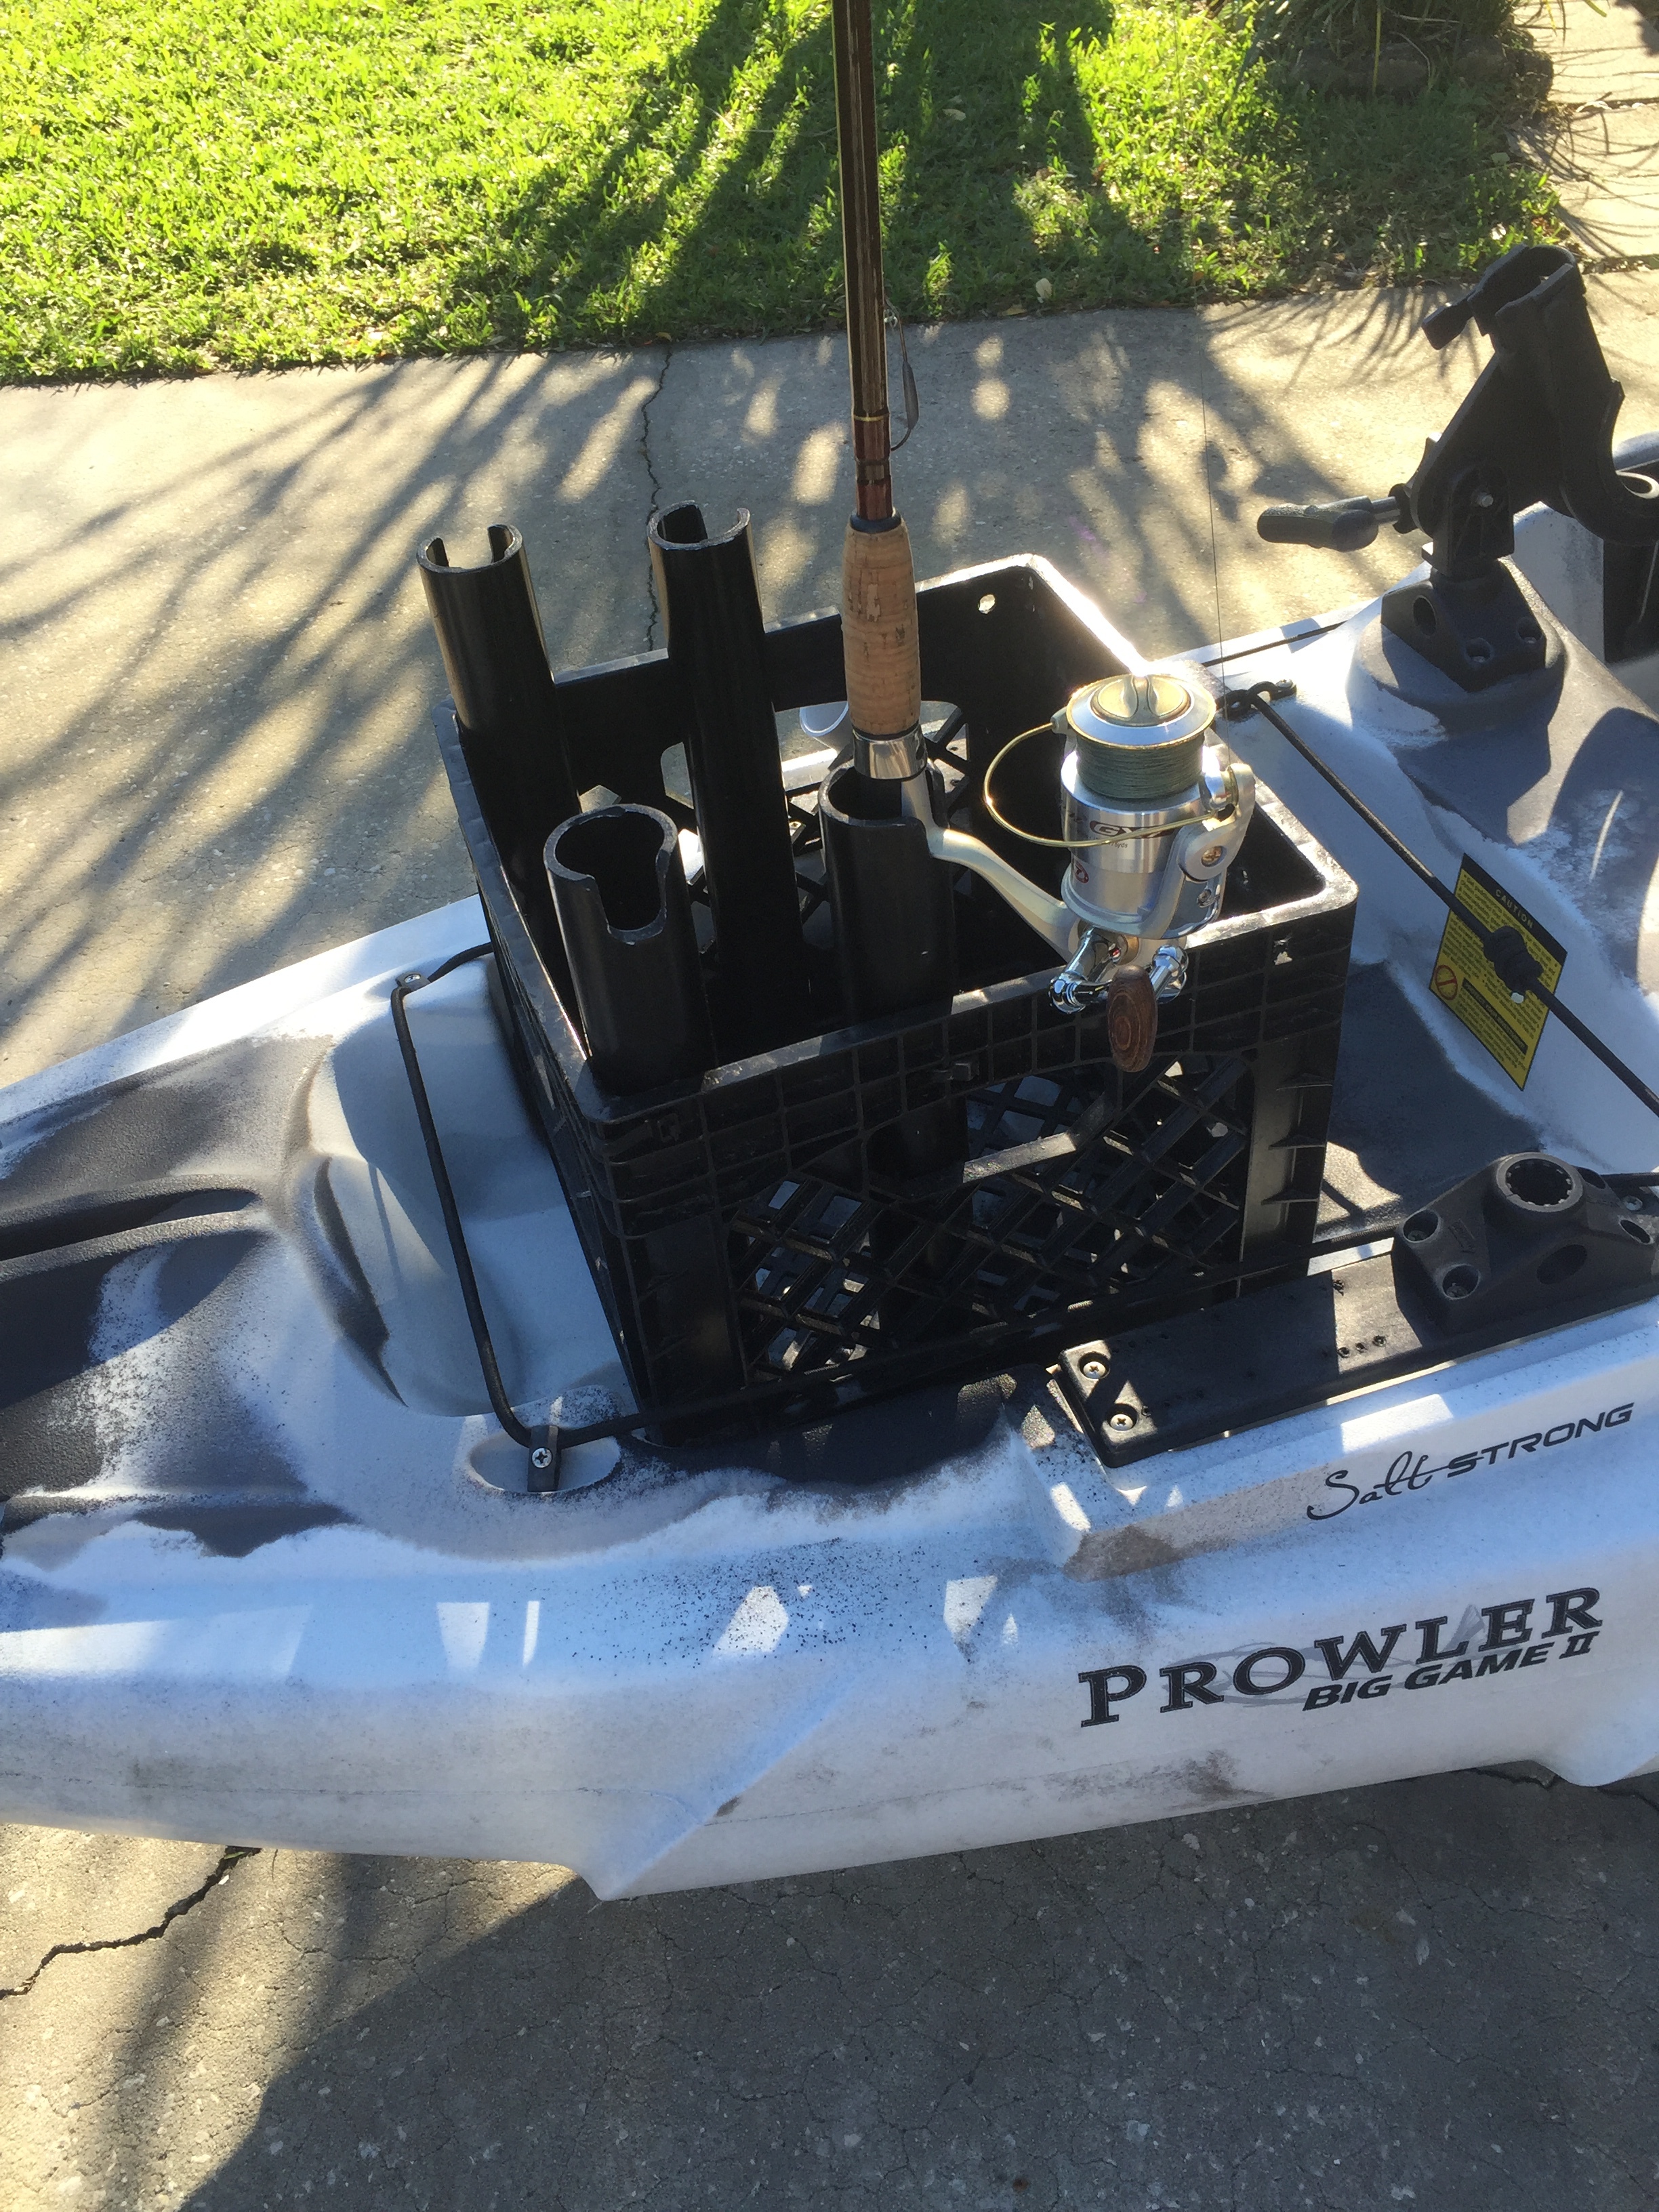
Rod holders behind you for storing extra rods – Most fishing kayaks will have flush mount rod holders just behind the seat. If not, you can easily add your own either by attaching rod holders to your kayak, or simply adding PVC pipe tubes to a milk crate that you may use for tackle storage.
Here’s a simple and cost effective rod holder/tackle storage for my kayak
Tackle Storage – this can be anything from a milk crate behind you in the rear tank well or even just a dry bag to keep your tackle boxes in.
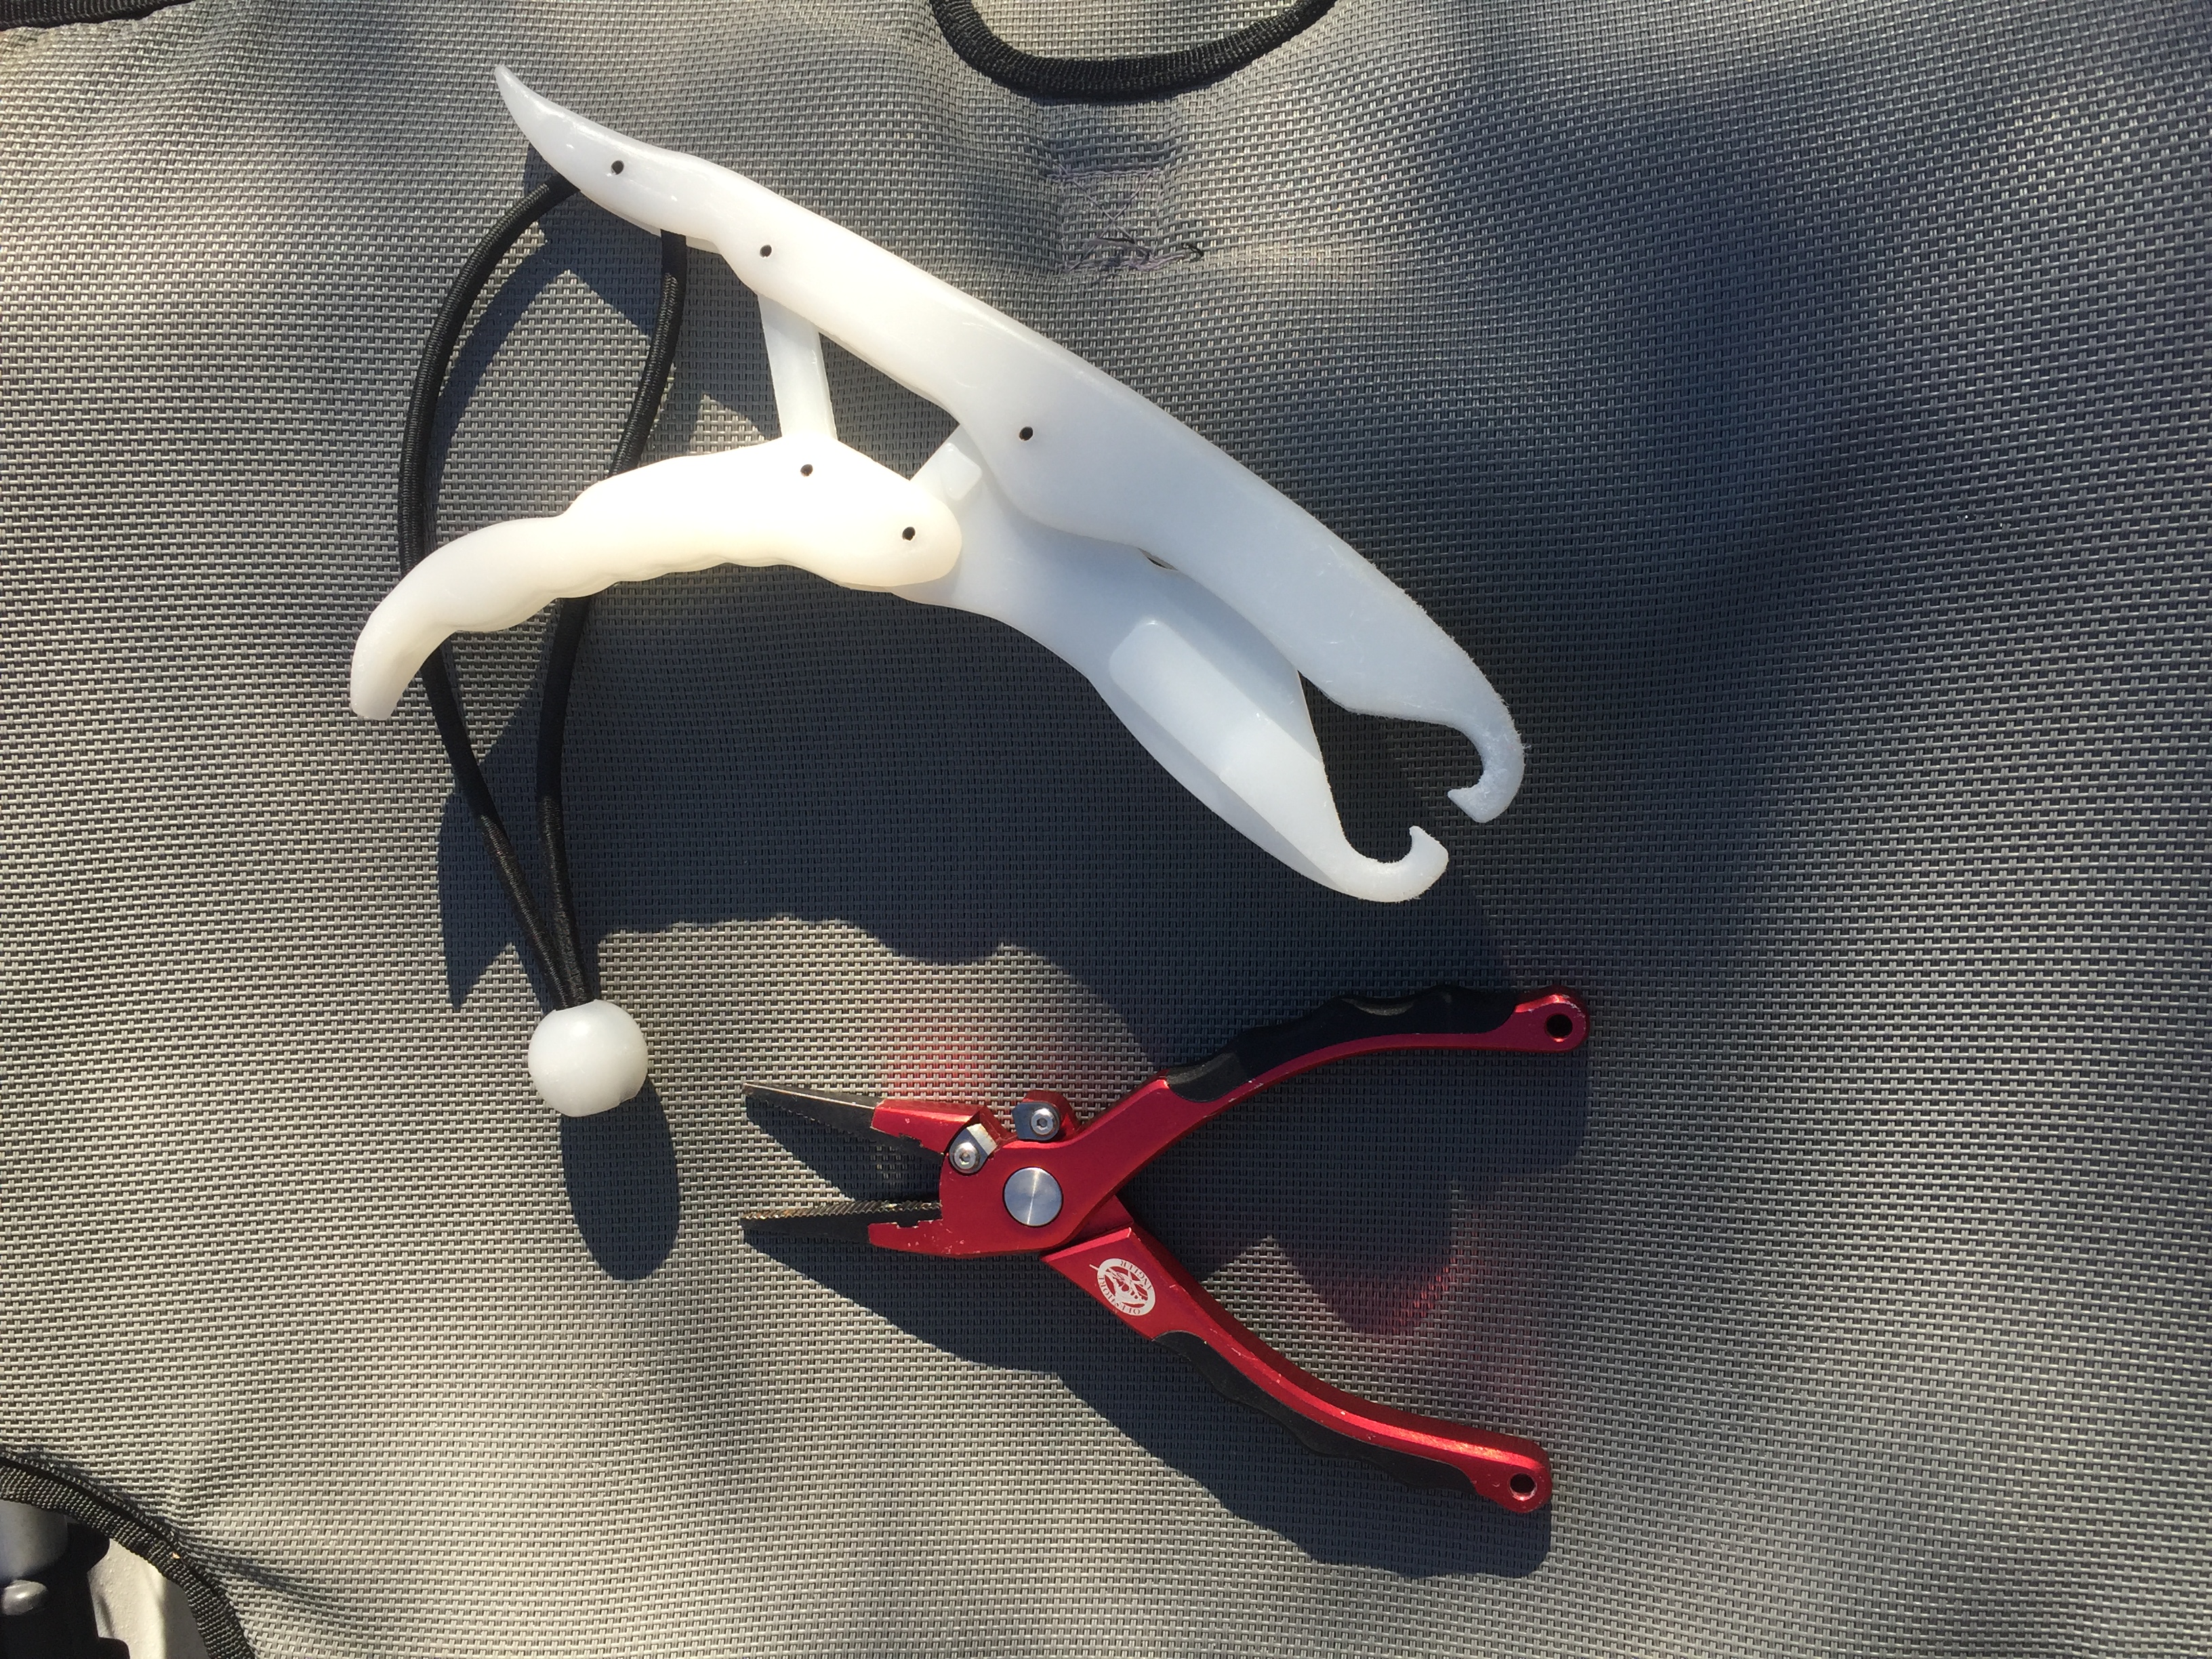
Tools – the main tools you should carry are pliers, scissors to cut braid (some pliers have a braid cutter on them), and fish grips and/or a landing net
Don’t ever leave home without a set of pliers and some fish grips!
Anchor Trolley – this allows you to change your position when anchored by simply pulling on a rope. Highly useful when fishing in wind or current.
Anchor Pin – When fishing inshore, you are typically in water less than 5ft deep. An anchor pin is the quietest way (and most efficient) to anchor in the shallows. When combined with an anchor trolley, you have yourself an awesome rig for anchoring your kayak.
Attaching Equipment To Your Kayak
Before attaching any accessories to your fishing kayak, take it out for multiple test runs.
This allows you to get a feel for the proper placement of accessories so that they are fully functional and not in your way (or too far out of your reach).
The best example would be a rod holder mounted in front of you. If it is too close, it will get in the way of your paddling stroke. If it is too far, it will be inconvenient for you to have to reach for it (and create any unnecessary noise that can spook fish due to having to move around too much)
The great news is that it’s very simple to install your own accessories.
Just be sure when installing rod holders that they are on a nice flat surface. This helps to avoid them leaning and possibly cracking the hull of your kayak, and also stretching out the holes that the screws are in causing water to enter your kayak.
Always use stainless steel hardware when installing accessories. This will save you from having to replace rusted out screws, nuts, and bolts. Saltwater is very corrosive and stainless steel is most resistant to corrosion.
This will save you from having to replace rusted out screws, nuts, and bolts. Saltwater is very corrosive and stainless steel is most resistant to corrosion.
Whenever possible, always use a marine grade silicone sealant in any holes that you may put a screw or bolt into.
Again, this helps with keeping any excess water from entering the hull of your kayak and also gives some extra adhesion for your equipment.
Tips On Buying A Fishing Kayak [VIDEO]
Sign up for FREE to receive the latest saltwater fishing videos, tutorials, product reviews, and fishing product discounts!
No matter what type of vehicle you drive, whether it be a car, truck, or SUV, there are ways to transport your kayak.
The most important factor is whether you are able to physically handle your kayak or not.
Definitely take this into consideration when purchasing a kayak. Small trailers are available to transport your kayaks and are best suited for heavy, bulky kayaks, such as the peddle driven types, which can weigh 100lbs or more.
This is also the best option if you just aren’t physically capable of throwing a kayak on top of your vehicle without damaging it, or yourself.
Important Note: remember that trailers must be registered, which can be another expense.
First, let’s talk about the different methods of transporting and what to consider when transporting your kayak.
The most standard method of transporting is just by strapping the kayak down to your vehicle’s roof rack. While this sounds pretty simple, be sure that you are securing it safely while also protecting it from damage.
Use foam or pool noodles on the crossbars of your roof rack so the metal does not dig in, dent, or crack the hull of your kayak. This is recommended for any method you may use for transporting. Plastic strapped down to metal is a recipe for disaster. Protect your investment!
Also, be sure to strap your kayak with the top facing down since it is a flatter surface than the bottom.
If at all possible, try to avoid using the “ratcheting style” tie downs. You can end up over tightening them which can damage your kayak.
The best options are the “lashing” style tie downs in which you just pull on the strap for it to tighten.
In addition to just using your crossbars, there are kayak “cradles” that can be mounted on to your crossbars if you prefer to have your kayak facing upright, or if your kayak doesn’t allow for upside down transport (accessories mounted on the kayak are in the way, etc.)
There are also molded foam blocks that can be placed on the roof of your vehicle if you do not have a roof rack. These can also be used on your crossbars.
An SUV with kayak cradles
Possibly the most convenient way of transporting a kayak is by using a pick-up truck. It’s low to the ground and they all typically have hooks that allow for you to easily tie down your kayak.
As I mentioned before, be sure to protect the bottom of the kayak if you are strapping it down.
You can lay a couple thick pool noodles down for it to rest on and then strap it down.
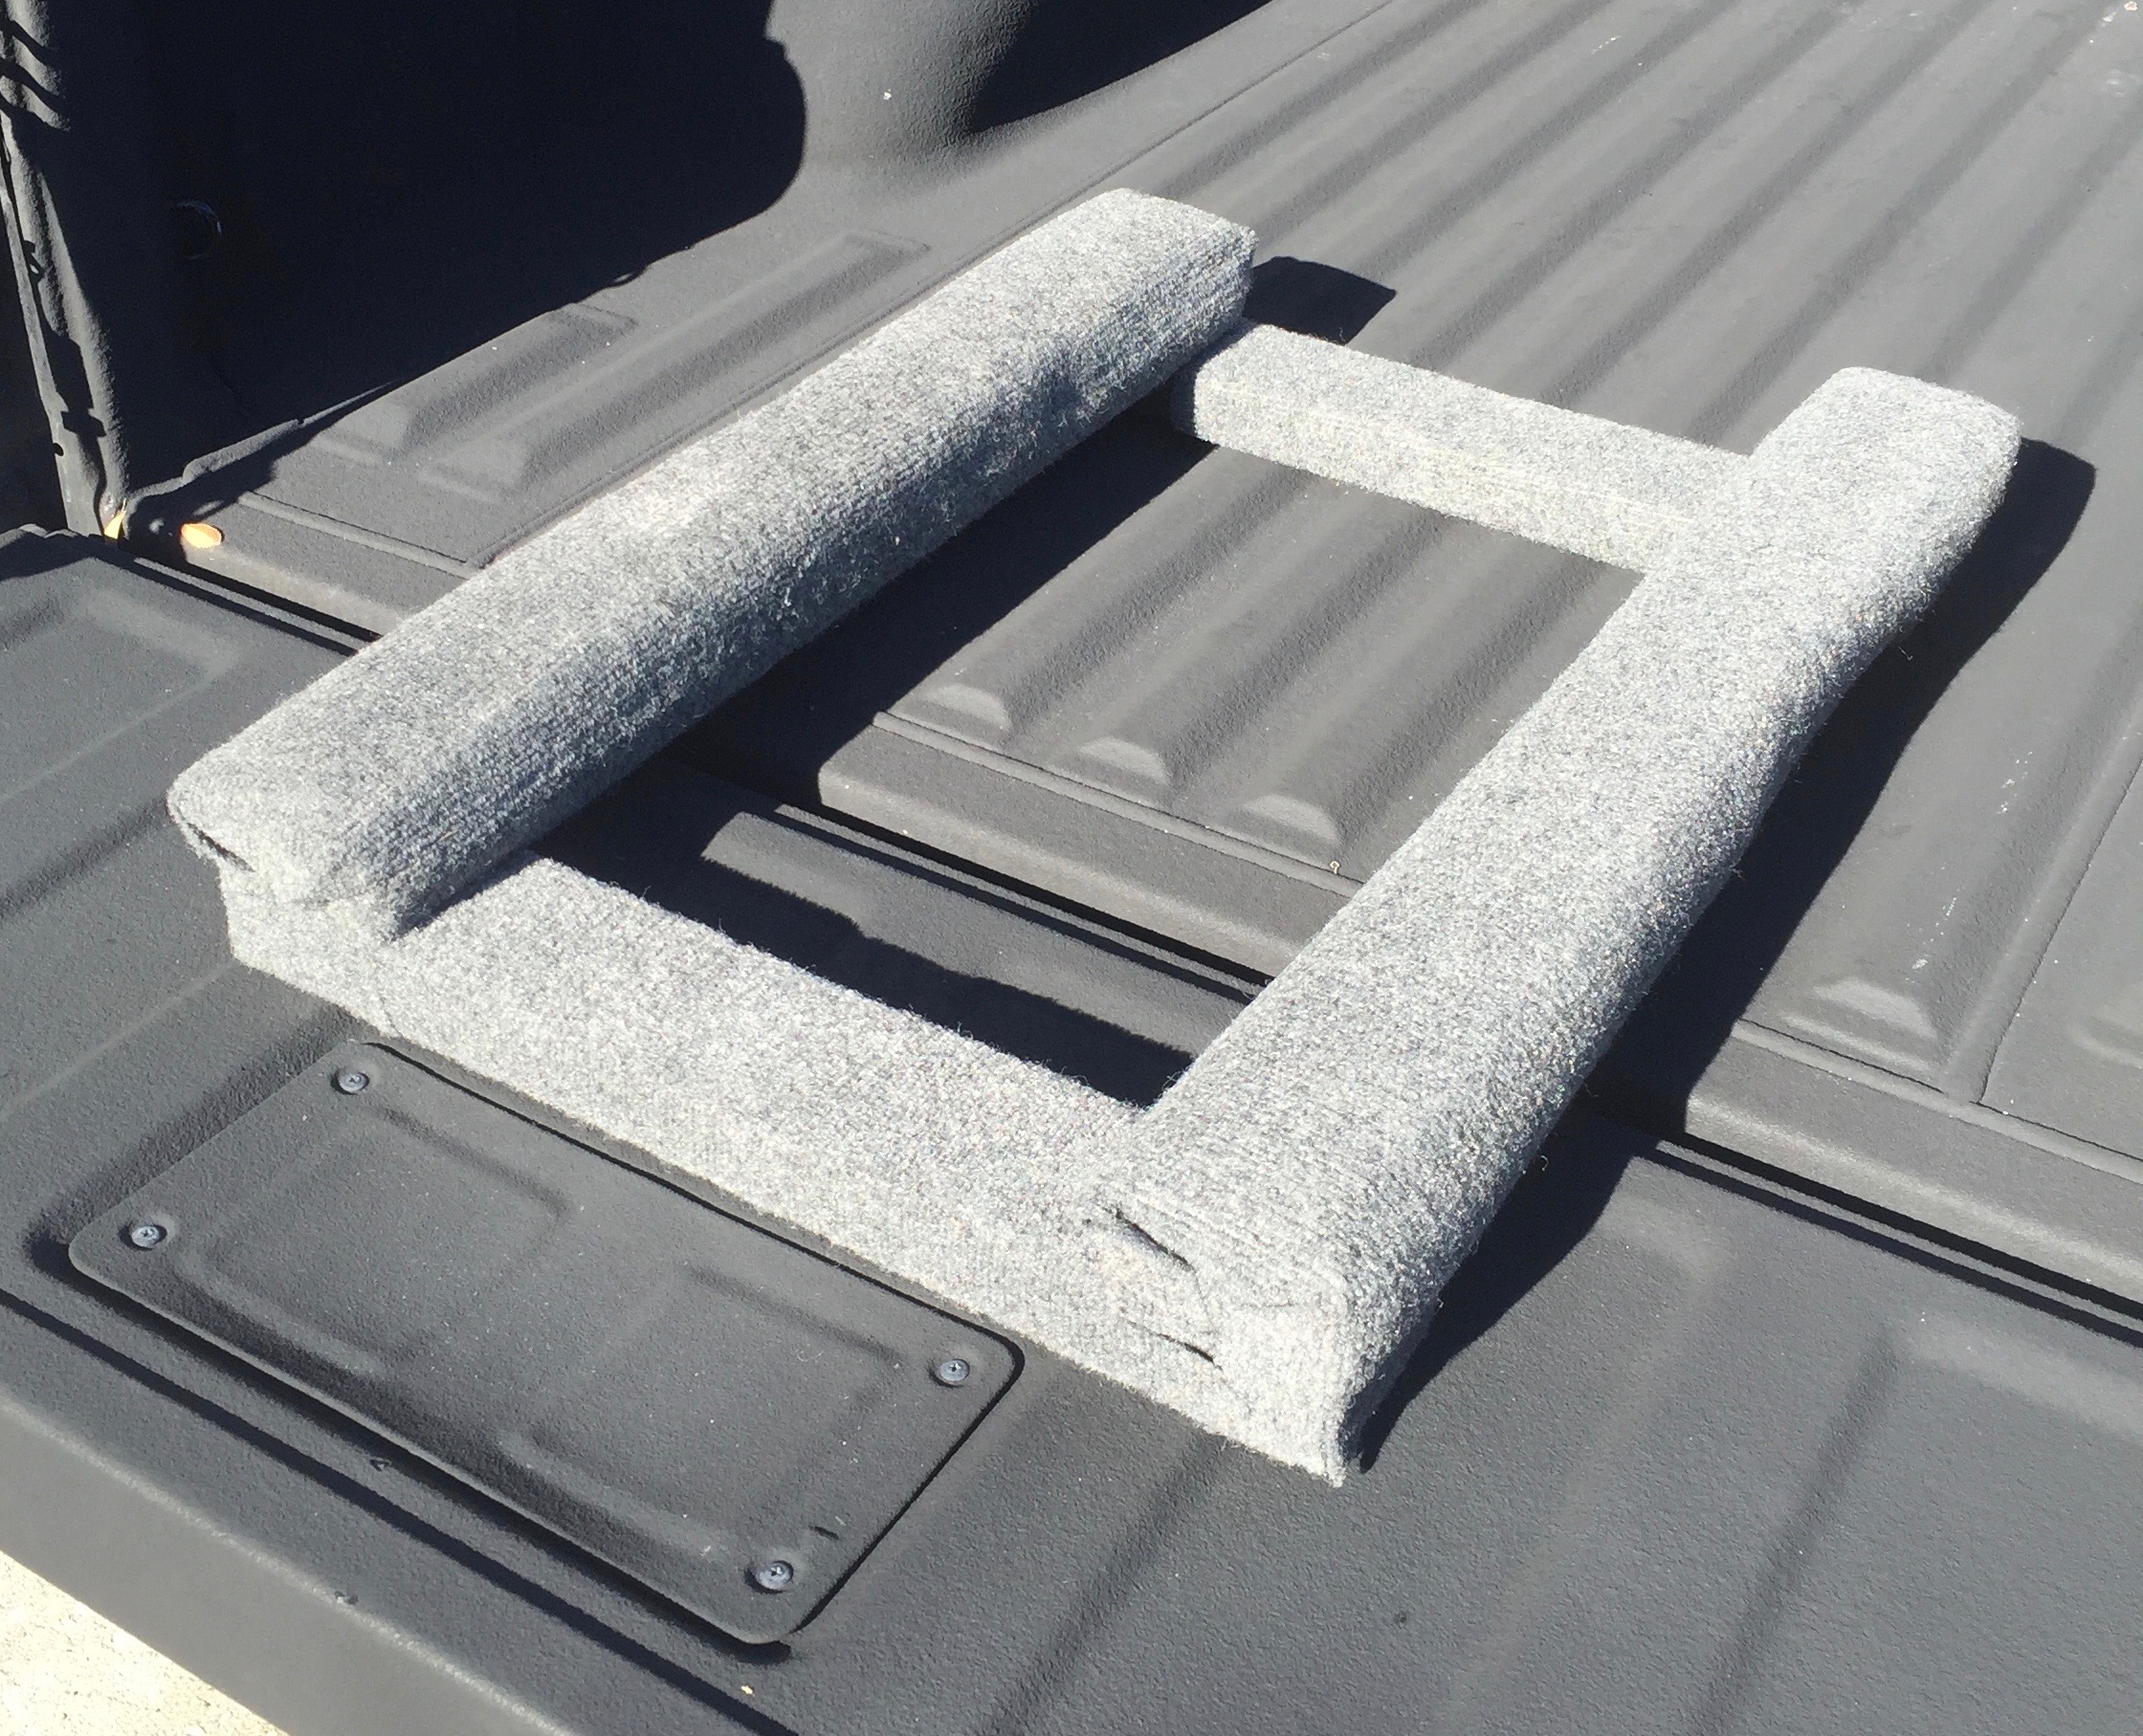
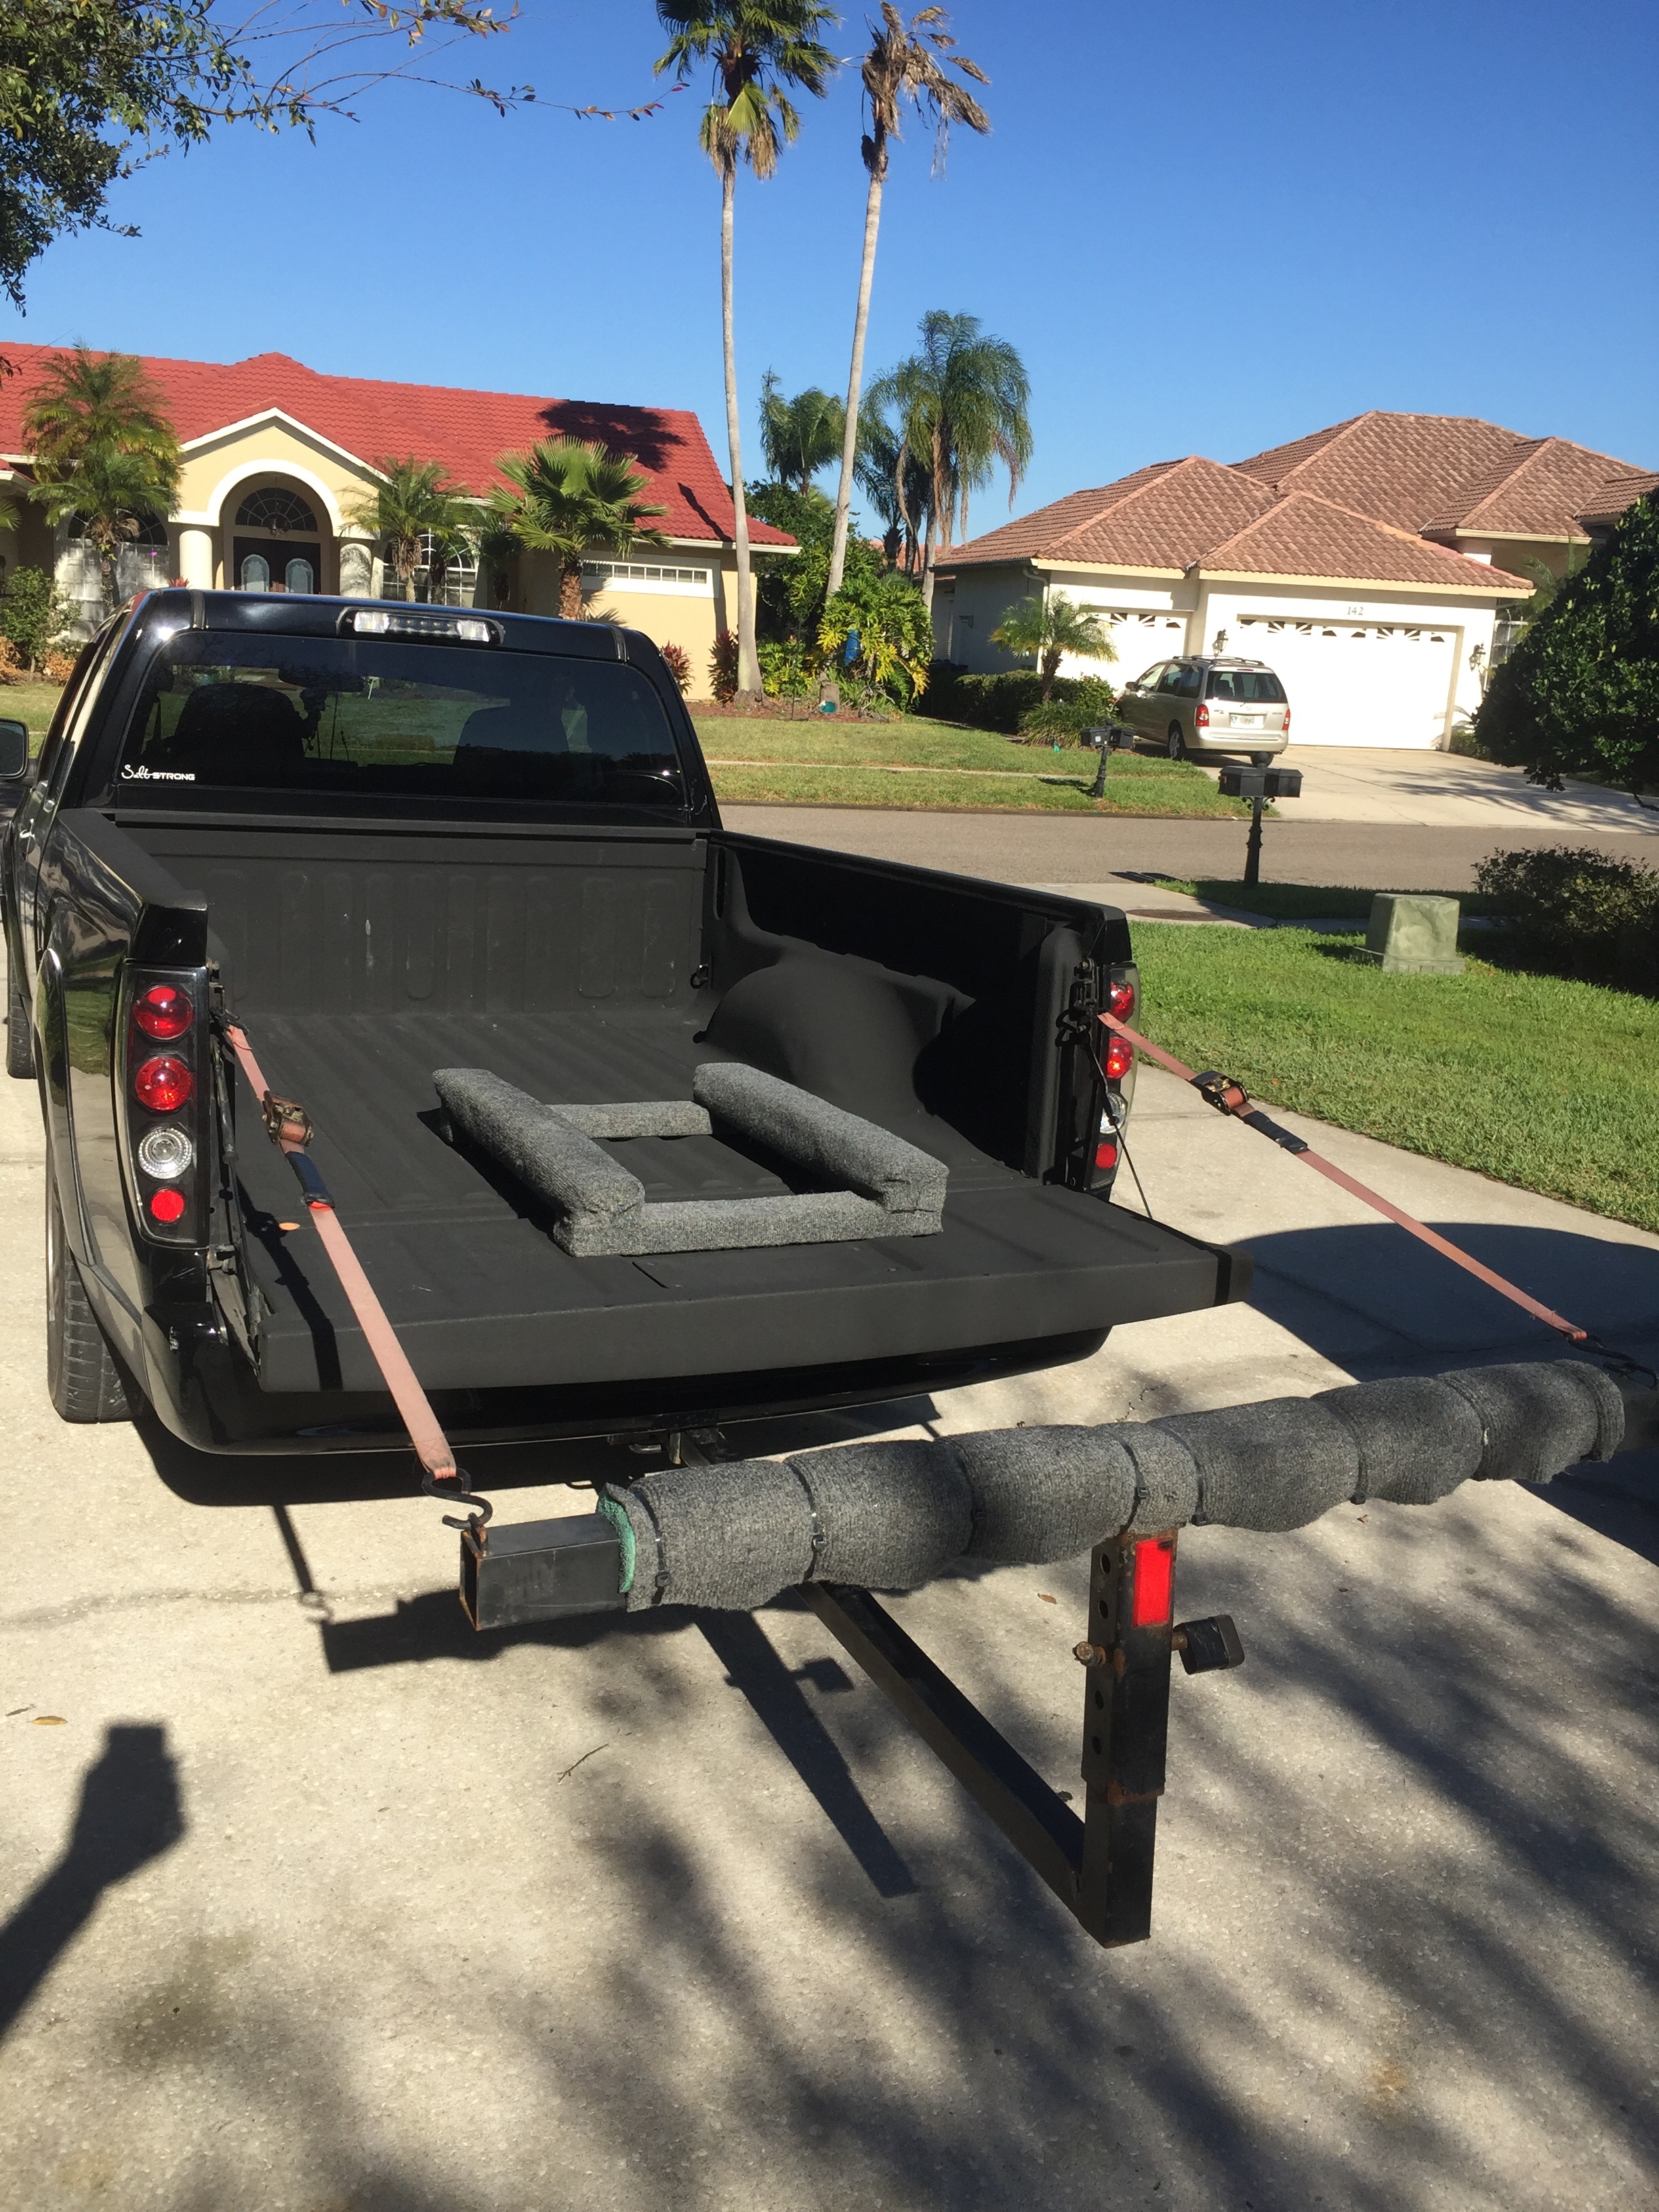
Or if you want to get creative, you could build your own type of rack for it to rest on as I did that you can see in the image below.
Note: I simply cut some 2×4’s and measured for it to fit within the channels underneath my kayak and screwed them together for my kayak to rest on. I then added foam to the top of the wood that the kayak would be resting on, then stapled some indoor/outdoor carpeting to it for the kayak to easily slide on.
My DIY kayak truck rack/protector
If you have a very long kayak, or a short truck bed, you may want to purchase a truck bed extender (this will only work if you have a hitch mounted on your truck).
This gives extra support for the end of your kayak that is sticking out from the truck bed.
This also can act as a “ramp” to slide your kayak up into your truck bed. As you can see in the image below, I zip tied a pool noodle to the extender for extra protection and support.
My truck with a kayak extender
How To Store Your Kayak
Now storing your kayak should not be overlooked. In fact, this is a critical part of owning a kayak.
Why?
This is probably where your kayak is going to be spending most of its time aside from being on the water. I’ve seen kayaks get destroyed (permanent warping from sitting on crossbars too long without use, rust from being in an open area near saltwater, etc).
There are multiple options for storing depending on how much space you may have.
Wall mounts are available and work great.
There are also systems to hang your kayak from the ceiling and pulley systems to get it up there.
Since I have the space (and my kayak is a little bulky to put on a wall or ceiling), I simply have my kayak sitting on the ground on top of the same rack I use in my truck bed.
It doesn’t put any pressure on the kayak so it doesn’t risk warping or getting damaged. The most important factor in storing your kayak is keeping it from being damaged.
Important note:If there is too much pressure on a single part of the kayak, it will damage over time.
If storing outside, be sure to have a tarp or some means of covering the kayak to protect it from the sun.
UV rays can weaken plastic and cause it to become very brittle and more susceptible to cracking. Also, be aware that when plastic heats up it becomes softer. So definitely make sure there aren’t any pressure points on your kayak if storing in areas of high heat, such as storage units, outdoors, garages, etc.
Conclusion
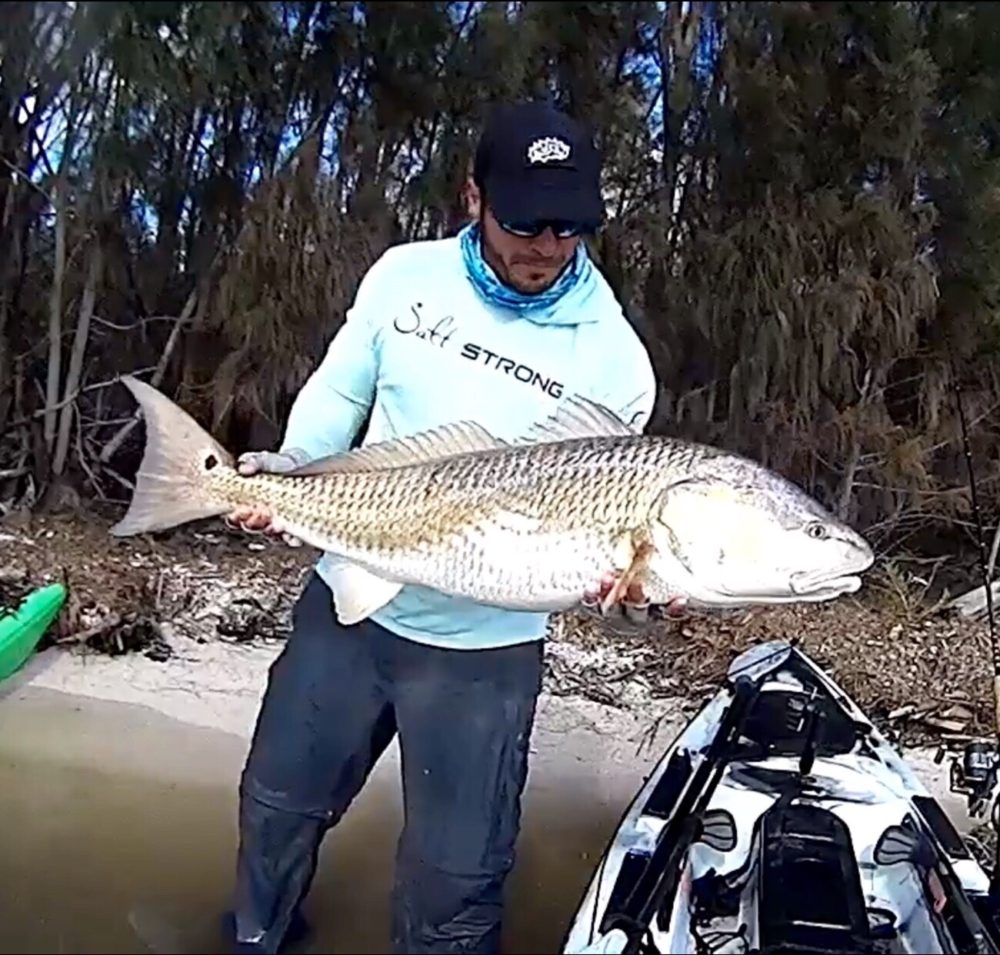
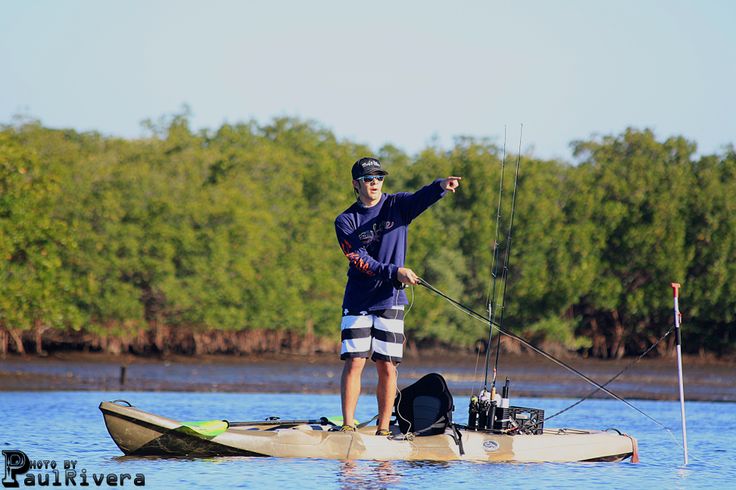
The author (Tony Acevedo) with a nice bull redfish from his kayak
Kayak fishing is certainly one of the fastest growing segments in both freshwater and saltwater fishing.
Compared to boats, they offer tons of advantages:
Kayaks are more affordable than boats
Easier to load/store/transport
Kayaks be launched in all kinds of places,
Kayaks can go in really shallow water (as long as you don’t have your pedals in)
But I’ve also heard from way too many anglers that had regrets after buying certain kayaks or certain accessories.
In pretty much all cases, had they done more testing and tried their kayaks out longer, they could have avoided the issues.
Most kayak retailers will let you borrow or rent their yaks so you can test them out before buying. I encourage you to load it on your vehicle, fish out of it, and use it every single way (and place) you intend on using it once you own one before you commit to buying.
The best rule of thumb for buying a new (or used) kayak…
Try Before You Buy!
Best of luck out there.
Private Inshore Kayak Fishing Course
Finally, if you made it this far, we have a special offer for you (that ends Friday, January 27th at midnight).
If you are interested in catching more inshore fish from your kayak, then click here to see Tony’s private inshore kayak fishing course.
Otherwise, hope you got something out of this.
Please let me know if you have any specific questions or things I might have missed in the comment section.
Tight Lines!
P.S. – If you think any of your angler friends or fishing networks would like to see this, please Tag them or Share this with them. Thank you!
It’s kayak fishing tip time!
If you’ve ever fished from a kayak, then you probably know that one big downside is how low you are to the water when sitting down in your yak.
It’s a fact: height gives you a huge advantage while fishing (especially while inshore fishing).
I still recall the time I went kayak fishing with my brother Luke (who was on his paddleboard) and he kept seeing redfish that I couldn’t see due to his height advantage.
He kept saying, “Look at that redfish… look at that boil…” and I was scratching my head wondering what in the heck he was talking about.
It really does make a big difference.
A few advantages of standing up in a kayak are:
The extra height helps you see fish much quicker compared to sitting down when sight casting/fishing
You can see potholes, grass lines, and other structure much better while standing
You will be able to spot boils and bait much quicker while standing in your kayak
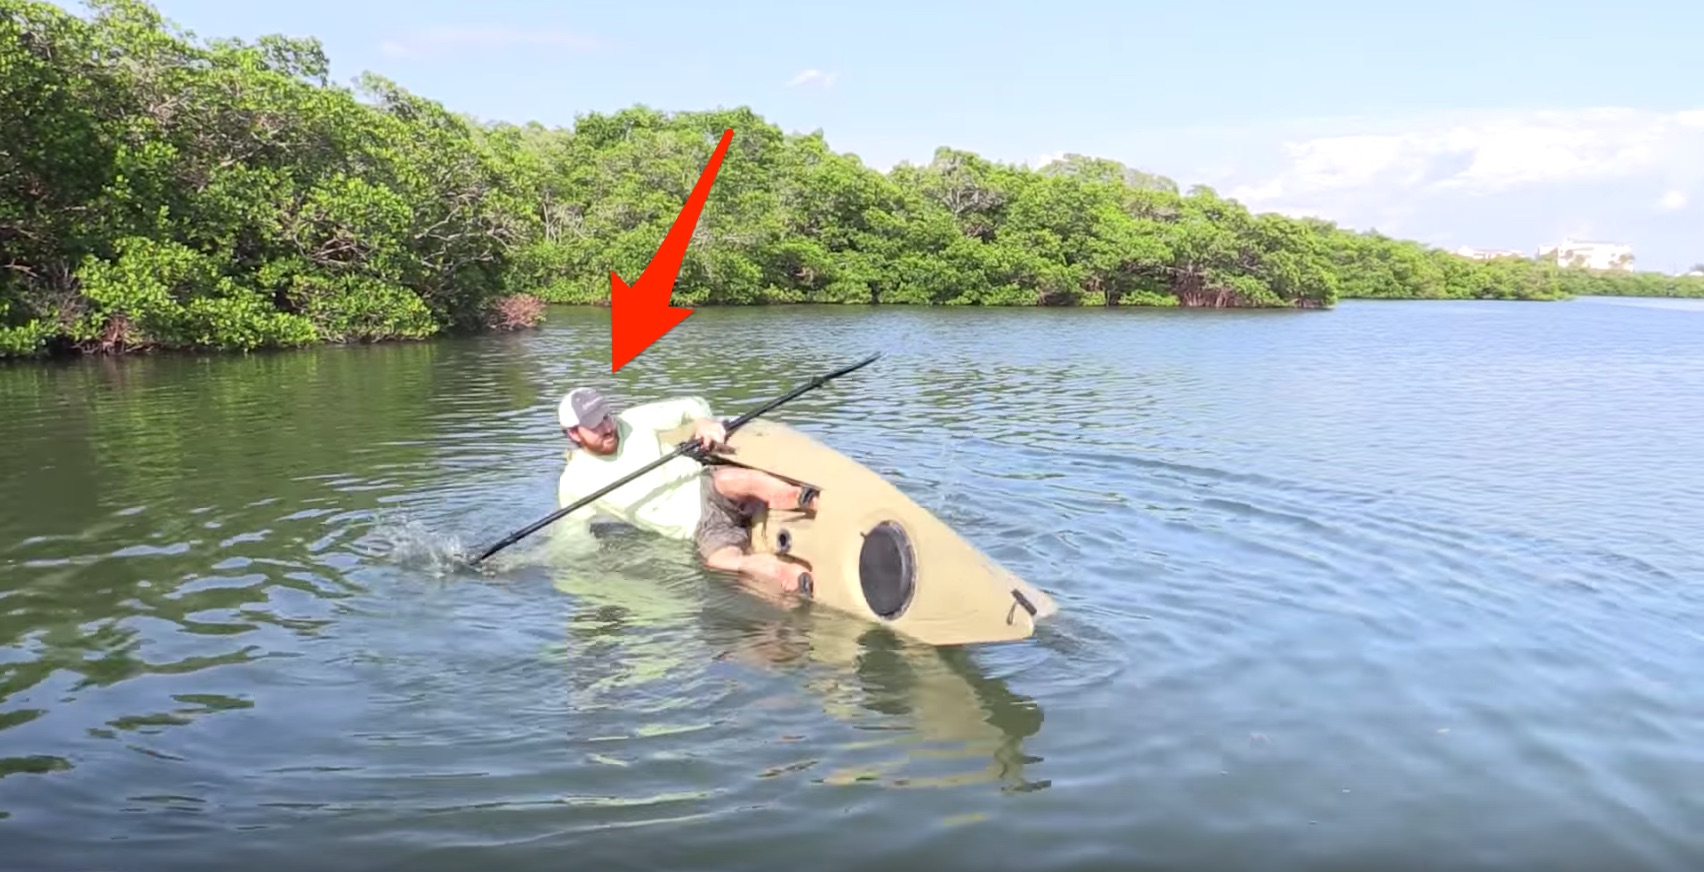
Of course, standing up in a kayak also has some pitfalls:
It’s easier to flip over or fall out of your kayak while standing
It can be a tough transition to go from paddling to casting without having to risk spooking the fish while repositioning your paddle
So what’s the fix to help you fish from your kayak standing up while not having to bend over and risk dropping your paddle?
The Kayak Paddle Trick
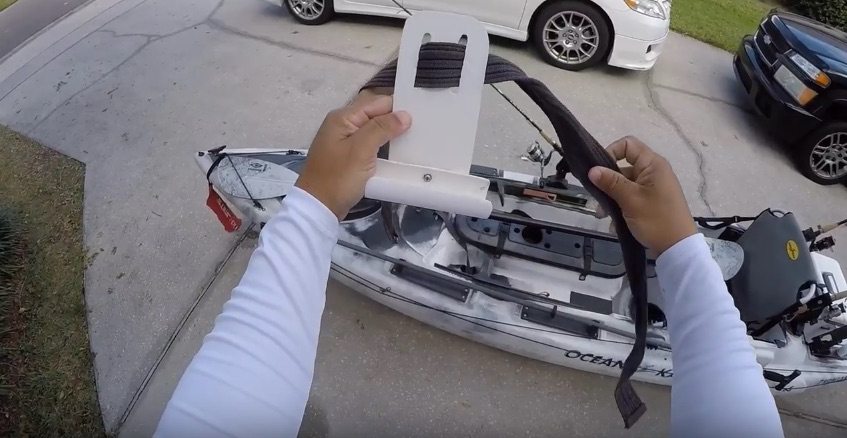
Here is a picture of Tony’s homemade kayak paddle holder belt
Introducing the easiest way we’ve found to ensure you don’t have to bend all the way down and risk having your paddle slam the kayak, slip, or fall in the water (all three of which we have done before).
The best news is that you can make this kayak paddle holder from home, and most of you already have most of the items.
Here is all you need:
A device to hold your paddle near your waist. Ideally, this is done by finding an old belt and either creating a flexible PVC holder (like Tony did in the video below), or a short rope with a small loop to hold the end of your paddle like Luke uses in this video.
Bungee cord up front so you can rest the paddle (without worrying about it slipping)
Kayak rod holder placed in front of you (just slightly out of the way of your paddle motion so you don’t have to bend over much while transitioning from paddling to casting
The Kayak Paddle Trick [VIDEO]
Sign up for FREE to receive the latest saltwater fishing videos, tutorials, product reviews, and fishing product discounts!
If you want to become a better inshore kayak fisherman, you need to learn how to stand up in your kayak.
Not only that, you need to have this simple kayak paddle holder to prevent your paddle from slipping off the yak or rolling around your yak spooking fish.
As you can see above, it can all be done with homemade parts.
Coming soon, we’ll cover some tips on how to actually stand up in your kayak without flipping over.
Stay tuned.
Do you have any other stand-up kayak fishing tips?
P.S. – If you think your angler friends or fishing networks would like to see this, please Tag them or Share this with them. You Rock! Pa-POW!
It’s kayak fishing tip time again!
In particular, how to launch your kayak from the beach without flipping over (or breaking your rods, losing your gear, etc).
Note: We’ll also cover how to come back into the beach without flipping over as well with a second video below.
And this week we have a special guest who spends more time on a kayak than he does in his bed… the owner of Emerald Waters Kayak Charters, Brandon Barton.
Let’s cover leaving the beach and making it through the surf first.
Here are Brandon’s best tips for surf launching your yak for offshore or beach fishing:
The surf doesn’t have to be really big for you to get flipped, so watching the waves for a bit and timing the sets is a big importance to busting through the surf.
The next step is to make sure ALL of your gear is leashed or strapped down to your kayak. Even a small wave can wash pretty much anything that is loose on your kayak (and ALWAYS wear a PFD – Personal Flotation Device when kayak fishing)
Once you have the timing down, hop in your kayak where the water is shallow in between wave sets.
Then, give it all you got and head straight out. Do NOT zigzag or try to hit the waves at an angle.
The most important tip is to keep your kayak heading straight into the wave. Goes as fast as you can straight into the breaking waves, and keep pushing through (regardless if you are paddling or peddling).
If you do get turned sideways and a wave breaks you will get flipped regardless if it is knee high or head high surf.
If you happen to fall out of your kayak, flip the kayak back over (if applicable), and make sure to hold on to your kayak tightly until you can get back in.
Know your kayaks limits and your physical limits.
Finally, it is always best to go out with a buddy!
How To Launch Your Kayak From The Beach [Video]
Sign up for FREE to receive the latest saltwater fishing videos, tutorials, product reviews, and fishing product discounts!
It’s always an adrenaline rush heading out (even with small waves), and regardless of whether you are staying close to shore and catching tarpon during the Florida mullet run or heading offshore for kingfish and sailfish, it never gets old.
But the one thing that can completely ruin a fun day of kayak fishing is a flipped yak in the surf.
You can break rods, you can ruin gear, and you can get seriously hurt if the waves are big enough and you aren’t careful.
Hopefully these tips from Brandon help and don’t hesitate to ask questions below on this topic (or any other fishing topics as well).
And if you are ever anywhere near Pensacola or Perdido Key, FL look up Brandon for an amazing day out on the water kayak fishing. Here is his business Facebook page: Emerald Waters Kayak Charters
Fish On.
P.S. – If you think your angler friends or fishing networks would like to see this, please Tag them or Share this with them. You Rock! Pa-POW!
A week ago, I posted a blog that got a ton of positive feedback called, “11 Essential Kayak Fishing Tips For Newbies”(you can read it here now).
It was loaded with kayak fishing tips, must have kayak fishing accessories, and information that can benefit all levels of anglers.
And as you can imagine, a few anglers asked for some additional advanced kayak fishing tips as well.
So we reached out to Salt Strong Ambassador Nick Lytle (saltwater kayak fishing extraordinaire) to get his take on three must know advanced kayak fishing tips.
Here is what he had to say…
Note: Nick is an experienced saltwater kayak angler out of the Florida Panhandle.
3 Advanced Saltwater Kayak Fishing Tips
By Nick Lytle
Tip #1: Use An Anchor Trolley To Position Your Kayak.
Kayak positioning could mean the difference between catching fish and going home empty handed.
Whether the goal is facing into the wind or facing down wind, anchor trolleys allow anglers to position their kayaks at the best angle. And if you want to be an “advanced kayak angler” and catch consistent fish in any type of weather, an anchor trolley is a must have.
Anchor Trolleys can be bought as kits or pieced together at your local hardware store.
And since there are multiple trolleys and ways to install depending on your kayak, I would encourage you to check out the several “How To” videos on YouTube that show the required items and the installation process for your specific kayak design.
Tip #2: Organization & Simplicity.
In the video below, I describe how I keep my tackle simple to catch more fish.
It’s a pretty simple (yet incredibly effective) plan. I simply carry three rods at all times while kayak fishing.
No more. No less.
Each rod allows me to cover a different section of the water column. Here is what my rod setup looks like on pretty much most of my kayak trips:
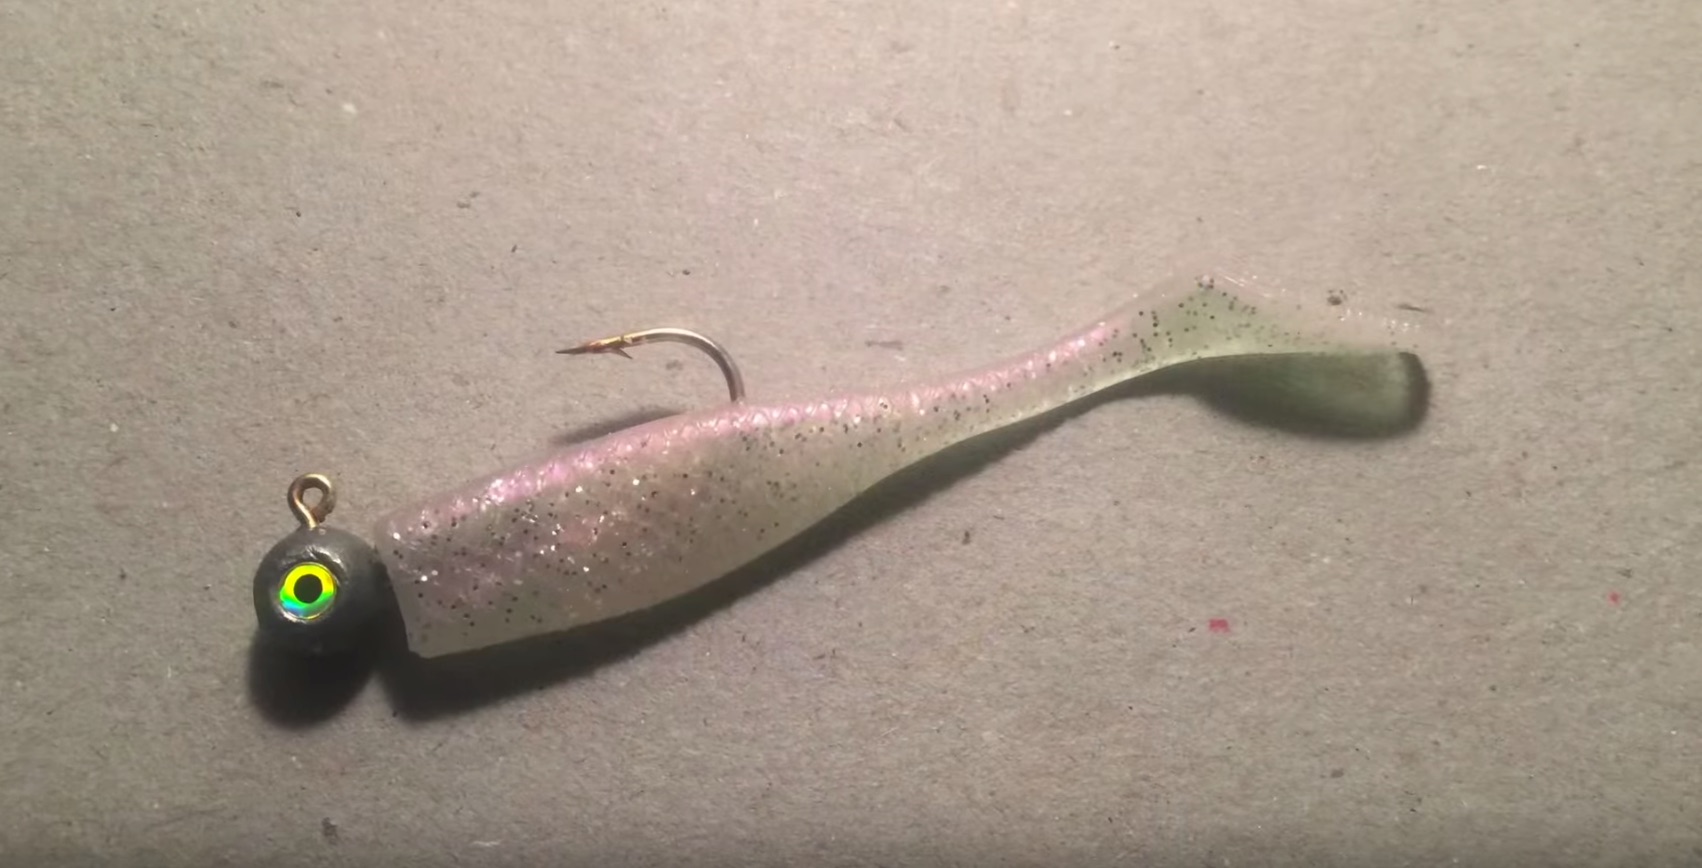
The first rod will be rigged with a soft plastic. (The amount of weight depends on the water depth and current.)
The second rod will have a lure that suspends in the water column, whether it is an Unfair Rip-N-Slash or a 17MR.
The third rod will be rigged with a top water lure.
These three setups allow anglers to catch fish in every situation, and I can simply turn around and grab whichever rod/lure is best for any given situation without having to re-rig.
Now, lets briefly talk about organization.
Organization is very important and could make the difference in landing the fish of a lifetime.
It’s always important to know the location of your net, where your fish grips and pliers are on the boat, and how to access them with little effort.
These items will allow you to safely land and release the fish.
To see more on basic fish handling techniques for kayak anglers, check out this blog post on the 11 essential saltwater kayak fishing tips.
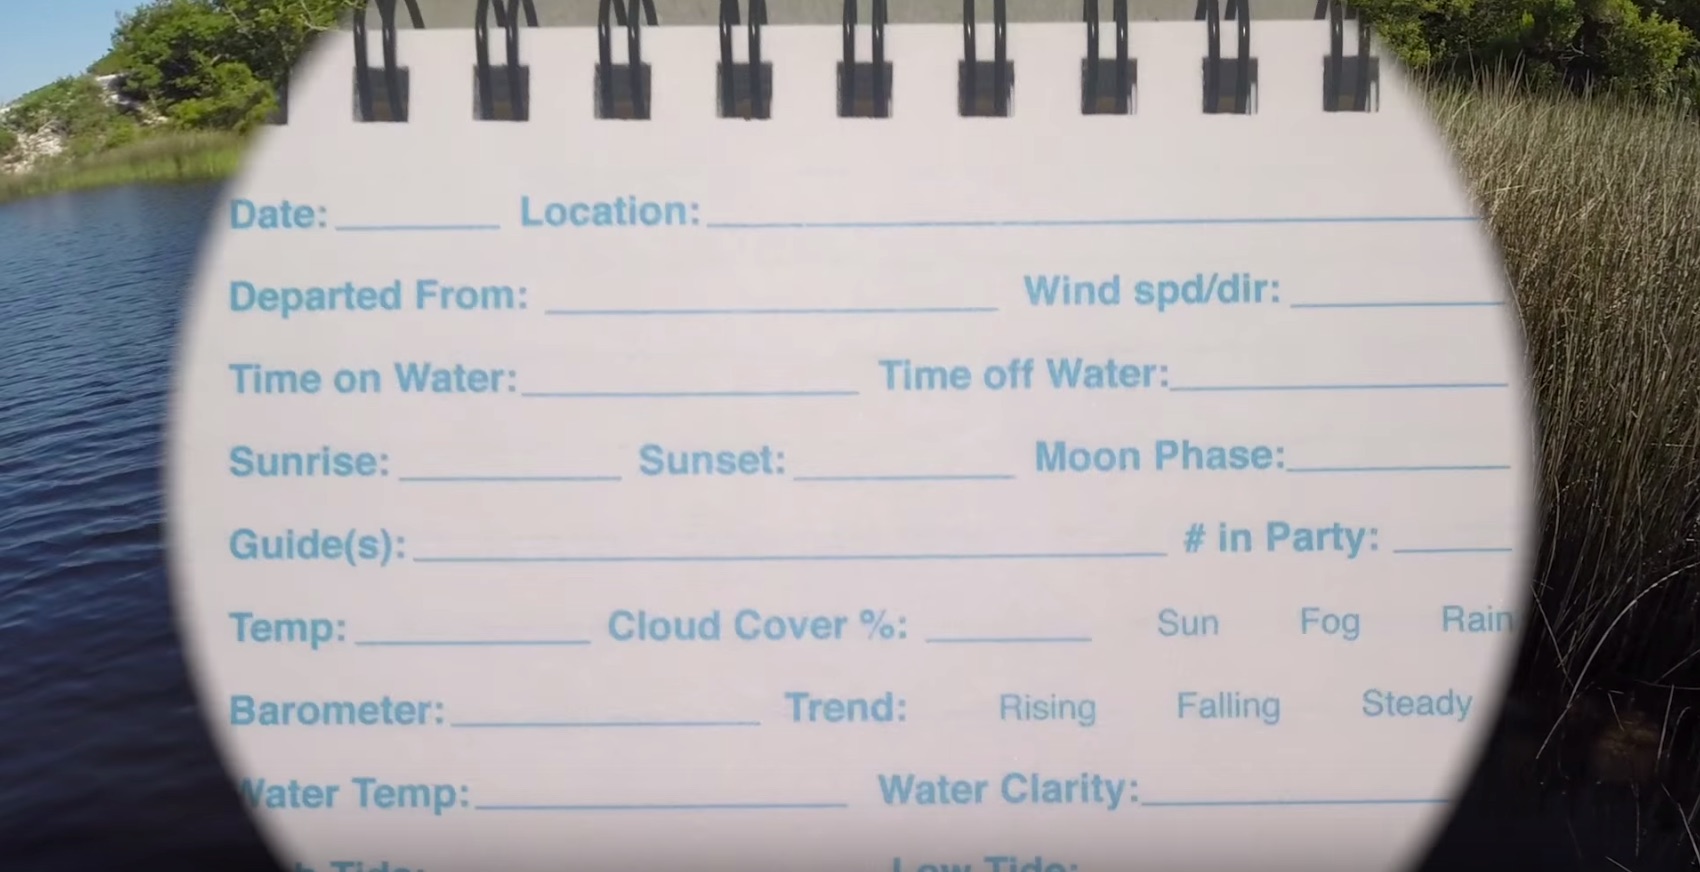
Tip #3: Take Notes On All Of Your Fishing Trips
I have had opportunities to fish with some excellent anglers and they all have had one thing in common.
They knew where the fish were going to be and why they were going to be there.
Many years ago, an older gentleman told me to document the conditions of every trip.
I was young and didn’t understand why it mattered, but now I realize that this man didn’t catch fish because he had the best is rod or reel.
He caught fish because he knew where the fish were going to be and why they were going to be there.
When attempting to figure an area out, be sure to document what you find.
In doing so, you will find trends.
Identifying trends is the key to finding the fish every time you are on the water.
Here’s a short story and perfect example:
In the last year, I began fishing a body of water that many said was a difficult area to fish.
I had previously fished the area several times without much success, and my opinion started to align with everyone else’s.
After reviewing my notes, I realized that all of my trips, on this particular body of water, had one thing in common — the tidal stage.
Even though these trips were spread out over the course of the year, I knew I needed to fish it under different conditions. Let me tell you, that place is one of the most productive Trout fisheries in the area!
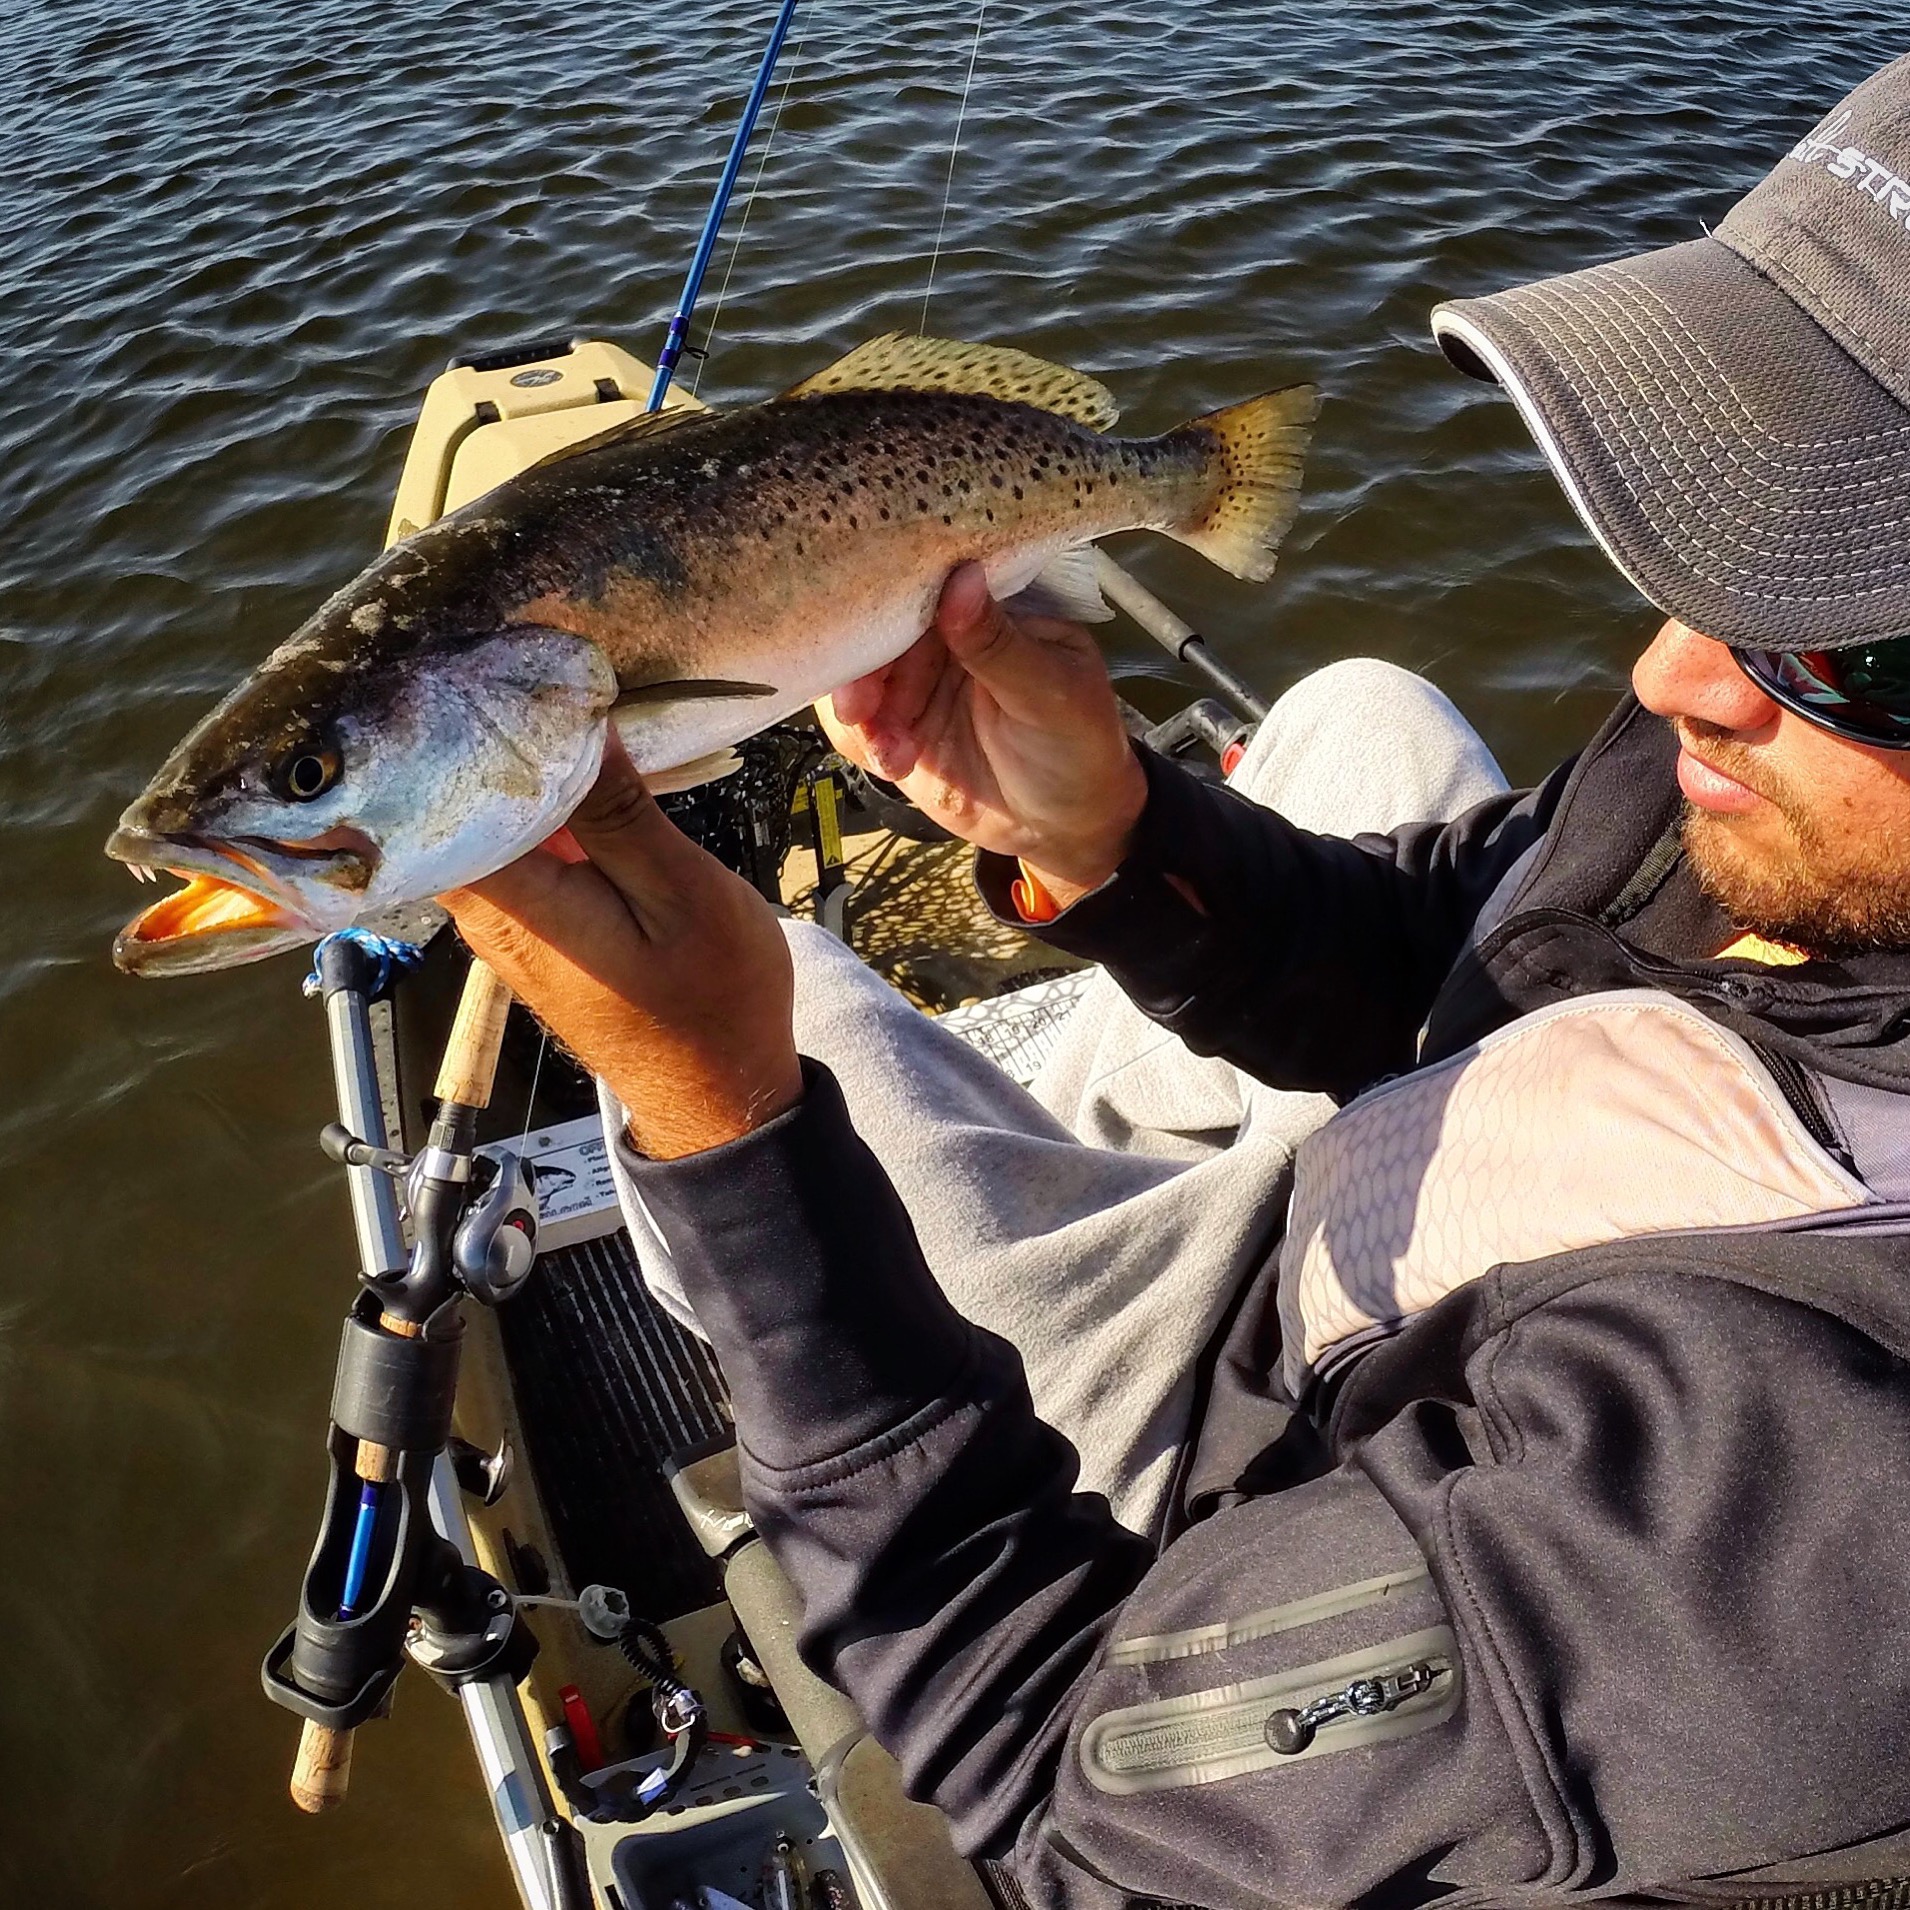
Author Nick Lytle and his speckled trout
The moral of the story is simple. You will never know what you are doing wrong if there’s nothing to look back on.
Take notes, review those notes, and be Salt Strong!!!
3 Advanced Kayak Fishing Tips [VIDEO]
Sign up for FREE to receive the latest saltwater fishing videos, tutorials, product reviews, and fishing product discounts!
If you thought journaling was just for poets, exchange students, and vegans, then you were wrong!
Some of the most experienced anglers (and most great fishing guides) keep journals of every one of their fishing outings.
I hope you also learned something from Nick’s other two advanced kayak fishing tips regarding the importance of an anchor pulley and keeping your tackle simple.
As we say here at Salt Strong, you are always better off becoming an expert at 1-3 lures and only using them than having dozens of different lures in your tackle box and constantly switching up baits.
Hope you got something out of this, and thanks again for the guest blog contribution Nick!
P.S. – If you think your angler friends or fishing networks would enjoy seeing this, please Tag them or Sharethis with them. You Rock! Pa-POW!
P.P.S. – If you believe that you have an original blog or video that would make for a great guest blog on Salt Strong, email fish@saltstrong.com with your idea or blog post. It must be original and it must be at least 700 words to be considered.
Beginners.
Newbies.
Newbs.
Juvenile Yakers.
Whatever you want to call someone that is new to saltwater kayak fishing, this blog post will help you have a better experience out fishing in your yak.
How?
Well, it’s jammed packed full of the top 11 saltwater kayak fishing tips that some of the most advanced kayak anglers said they wished they knew when they first started kayak fishing.
But don’t think this post is only for beginners…
Even many of you seasoned kayak anglers can learn a thing or two from these tips and I’m certain you seasoned yak anglers will be nodding your head in agreement with these tips.
Saltwater Kayak Fishing Tip #1
“Don’t Go Cheap On Your Paddle”
When you start kayak fishing, you will be surprised at how much ground you end up covering in your kayak.
And you will also be surprised at how important a good paddle is when you have to cover a lot of ground…
After talking to many seasoned saltwater kayak anglers, most of them give the following advice:
Don’t worry about getting the nicest kayak day one. You can always upgrade your kayak down the road. However, it is wise to invest in a good paddle.
You can always take the paddle with you when you upgrade your yak down the road.
Not only will a nice paddle help you in terms of speed and efficiency, but it can even help out your hands/arms in terms of fatigue. Also, a good kayak paddle can help reduce the number of blisters you get on your hands during a long session of paddling.
Don’t go cheap on the paddle!
Saltwater Kayak Fishing Tip #2
“Bug Spray”
This lesson always seemed to be learned at the worst time while kayak fishing…
Here is a story that might sound familiar to some of you veteran kayak anglers that have experienced mosquitos the hard way…
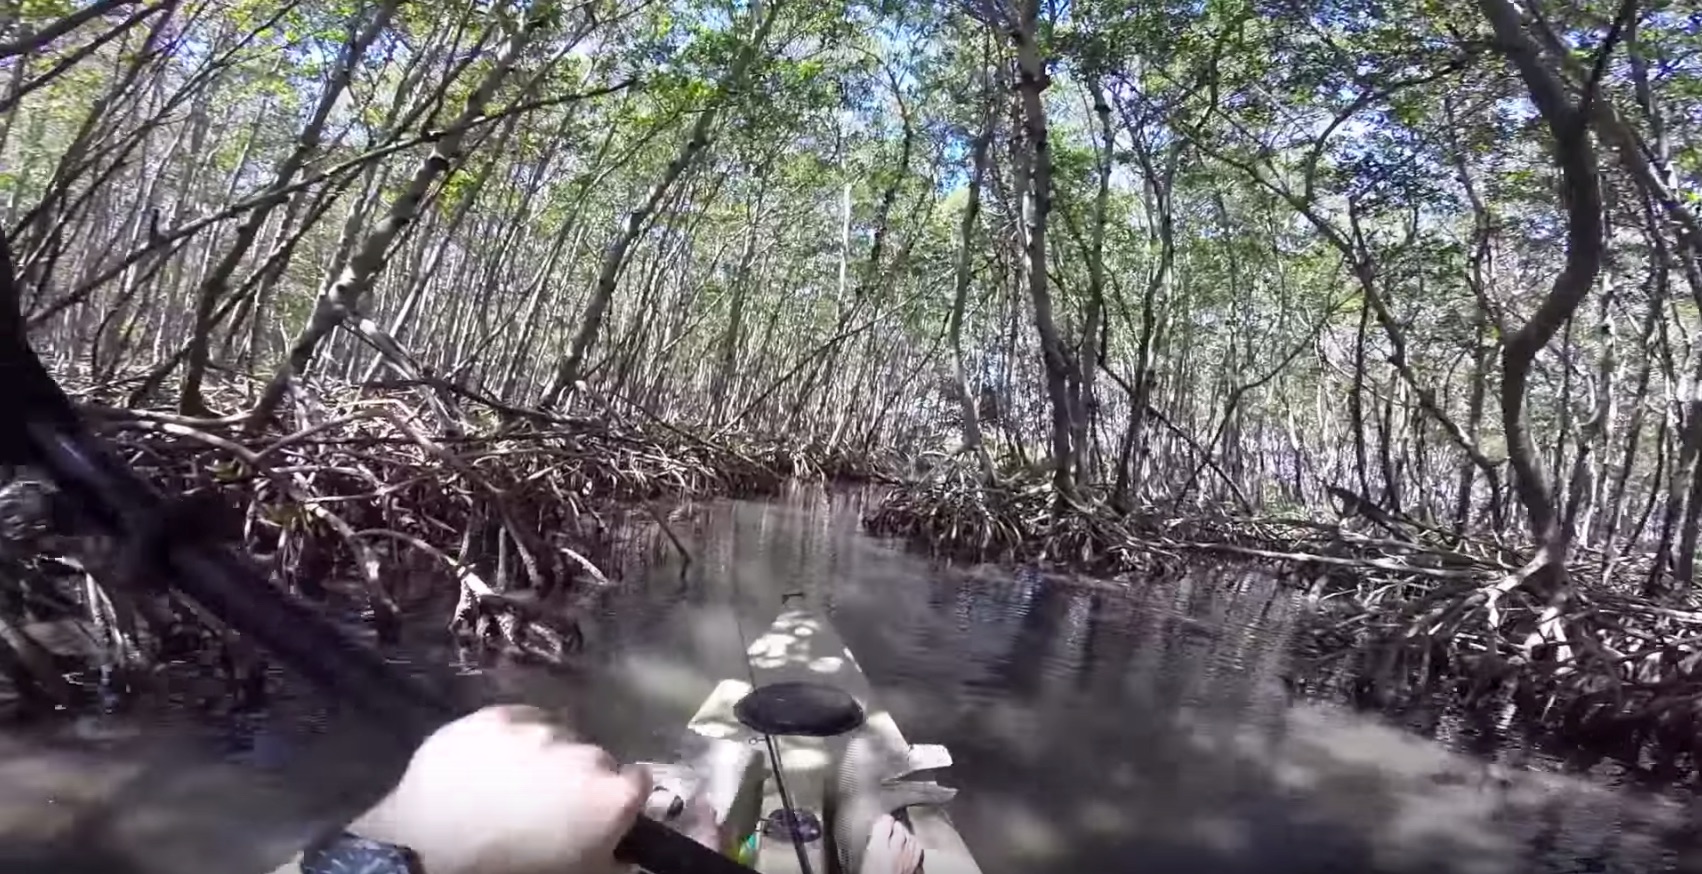
You’ve located a really cool hidden trail in the mangroves…
You lower your rods down, you duck down, you pull yourself through the opening, and Pa-POW… uncharted new skinny water for you to fish!
You see some swirls in front of you, and you start to notice mullet in the water and small crabs in the mangrove roots.
This is a dream come true for any saltwater kayak angler in Florida.
Or is it?
All of a sudden, you feel the bite on your neck…
Then your hand…
Before you know it, you are covered with blasted mosquitos, and they are unbearable without any bug protection.
Don’t learn this the hard way and have to leave an amazing fishing spot due to pesky insects. Put a bottle of insect repellent in your kayak and keep it there.
You will be glad you did.
Saltwater Kayak Fishing Tip #3
“Waterproof Camera with Mount”
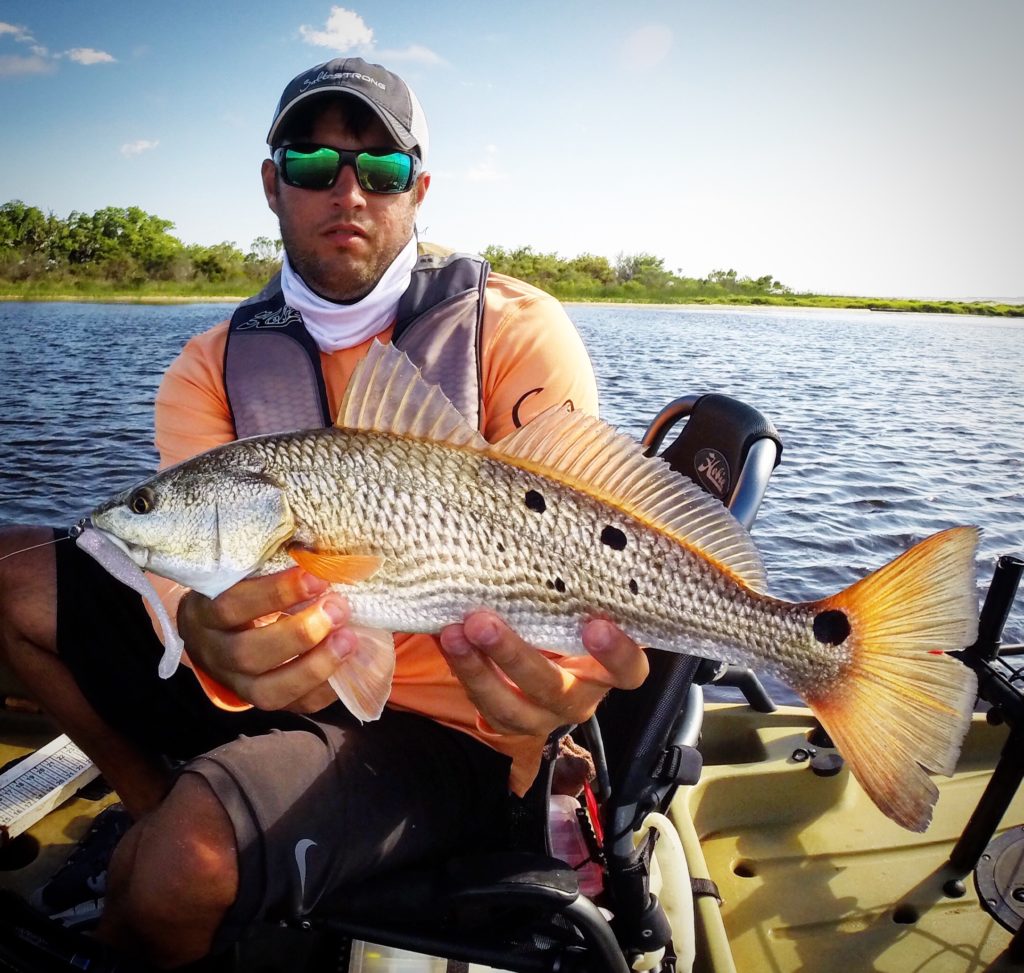
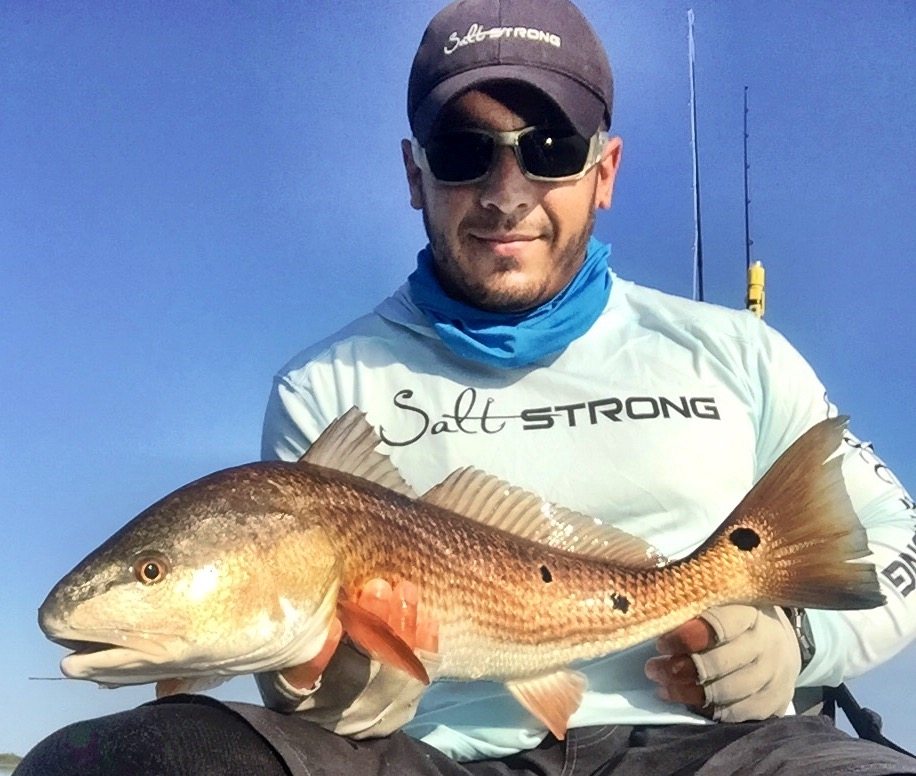
Strong Angler Nick Lytle with a nice redfish while saltwater kayak fishing
Many times the kayak angler finds himself or herself out there all alone on the water.
And that’s not a bad thing by any means.
In fact, it’s one of the pros of kayak fishing because you can do it without the help of other people (however, we highly recommend going kayak fishing with a partner in the beginning).
But nothing is worse than catching a trophy fish and having no way to take a picture to show your friends and family.
And let’s be honest with each other, if there is no picture or no witness, the catch might as well have not even happened…
So make sure to always take a waterproof camera (preferably something like a GoPro with the wireless remote that you can have handy at all times) and have a mount where you can position the camera while sitting down.
Then, when you land a lunker out in the yak, you can have the camera rolling and pull out as many screenshots and footage to show off to your friends as you need.
Don’t be the angler that tries to take selfies with his or her cell phone and ends up dropping it in the water when the fish starts shaking!
A kayak angler using a “Yak Stick Mud Anchor” while fishing
Ask a seasoned kayak angler to tell you their first “sleigh ride” story, and they will probably have an epic tale about how a large fish literally pulled them in the kayak while they fought it (sometimes miles).
And if they were fishing in skinny water, they might even have a tale or two about a fish pulling them right into the mangroves (I have heard of numerous anglers that have had their rods snap while getting pushed into the mangroves while fighting a fish).
Then there is the wind…
The wind can be one of your worst enemies while kayak fishing.
Not only does it make it tough to paddle into the wind, but when fighting a fish, the wind can play a critical role as well.
The lesson?
Make sure to always have either an anchor, a push pin, or some sort of “power pole” to help you hold your ground while out kayak fishing.
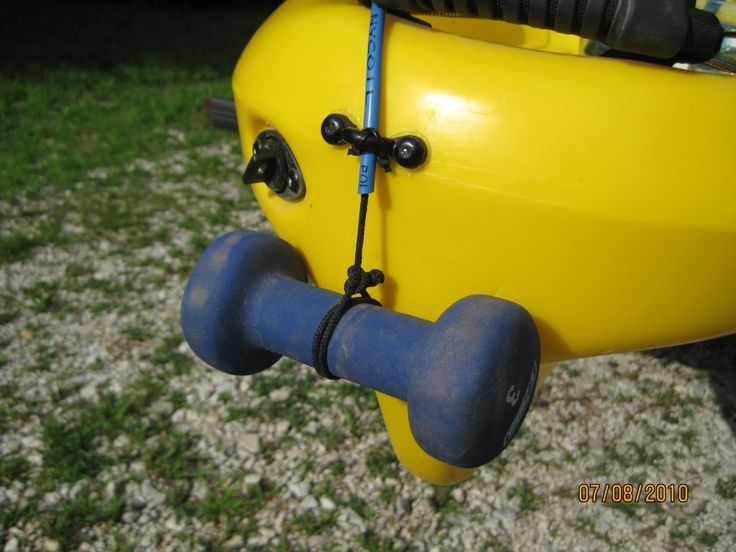
There are numerous ways to rig up a kayak with an anchor from a simple “dumbell anchor” like this…
All the way to elaborate pully systems like this from Dizzy Big Fish:
And one of the more popular methods today is the kayak power pole.
Just like a boat power pole but smaller (and slightly more affordable).
You can see the use of a power pole and a push pin in this great pic from Hobie Cat Forum
Just know that there will be many moments while kayak fishing where you will use something like an anchor, push pin or power pole, so don’t go cheap on this one either.
And on a windy day, you will be glad you paid for it!
Saltwater Kayak Fishing Tip #5
Sunscreen & Sun Protection Clothing
Strong Angler Nick Lytle with his Salt Strong sun protection gear on while catching a nice kayak redfish
Start taking notice of the top kayak anglers on Facebook and Instagram.
One trend you will continue to see is that more and more of them are covered up and protecting themselves against the sun’s harmful rays.
Because kayak fishing isn’t like being in a boat with a nice T-top, cover or cabin… there is nothing between you and the sun…
And when you combine that direct exposure with the fact you are close to the water’s reflective surface, it only takes a short kayak session to do some serious sun damage to your skin.
So here is what many of the top kayak anglers would recommend today in terms of sun protection:
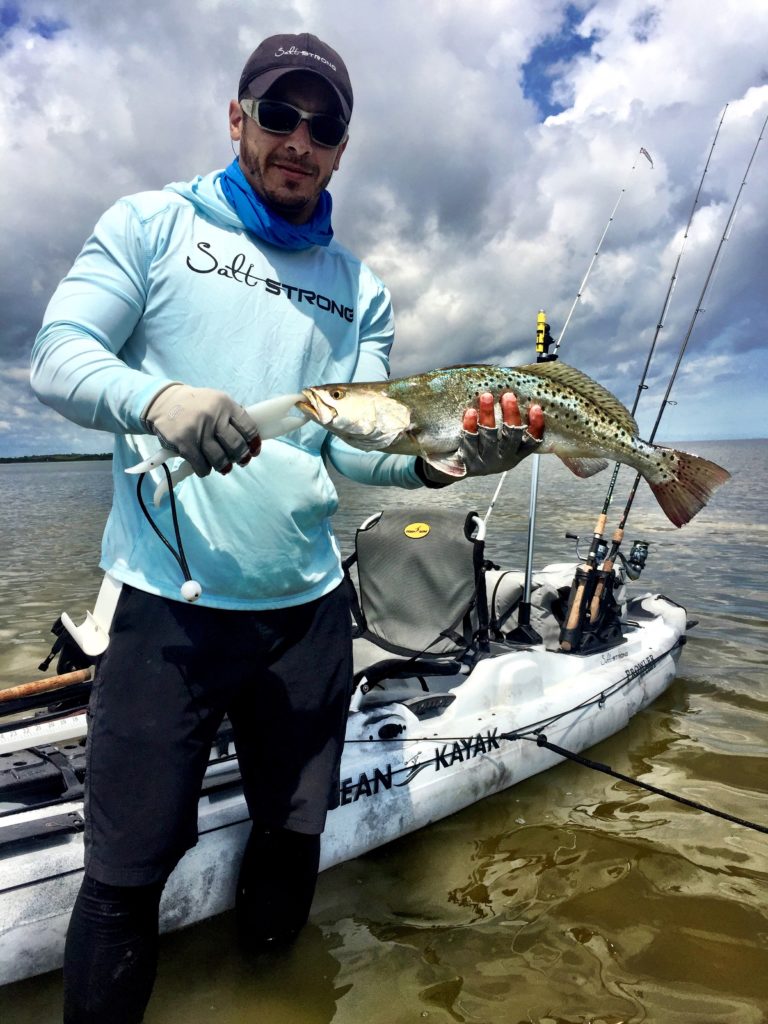
Strong Angler Tony Acevedo properly holding a nice speckled trout with his fish grips and gloved hand under the belly
I can still recall my very first saltwater kayak fishing trip and what went wrong…
After a short paddle out to a grass flat, I was casting my DOA lure and POW!
Fish On!
But after a few quick runs, I realized the fish was a jack…
After finally getting it to the side of the yak, I quickly saw that the jack had completely swallowed my lure and hook.
The worst part was I completely forgot to bring any pliers!
Fortunately, I had some nail cutters on me to cut the line. The jack did swim away fine, but it would have been a much easier operation if I had the right tools.
Just glad it wasn’t a catfish!
At any rate, here is a list of the proper fishing handling equipment you should have with you at all times while kayak fishing:
Fish Grip (aka Boga Grip or Lip Grip) to hold the fish
Pliers
Net
Line cutters
Gloves (optional)
Stringer (optional if you plan on keeping your fish to eat)
Here is a short video of kayak angler Nick Lytle showing how to properly handle fish while kayaking.
Sign up for FREE to receive the latest saltwater fishing videos, tutorials, product reviews, and fishing product discounts!
It’s one thing to have a boat full of fish after a long day of kayak fishing, but if you run out of water and get dehydrated, no amount of fish is going to quench your thirst.
And last time I checked, you can’t drink a fish (but don’t tell that to Nick “BrookFieldAngler” Doumel in the picture above).
So do yourself a favor and bring plenty of liquids…
Bring water
Bring Gatorade
Or anything else that you can throw in your yak (or place in a small cooler on your kayak).
You’ll be glad you did, especially on an especially hot day (or windy day when you are paddling or peddling like crazy).
And if you are kayaking with a friend, make sure they have enough water as well. There is nothing worse than going out fishing with someone that ends up drinking all of your liquids!
Saltwater Kayak Fishing Tip #8
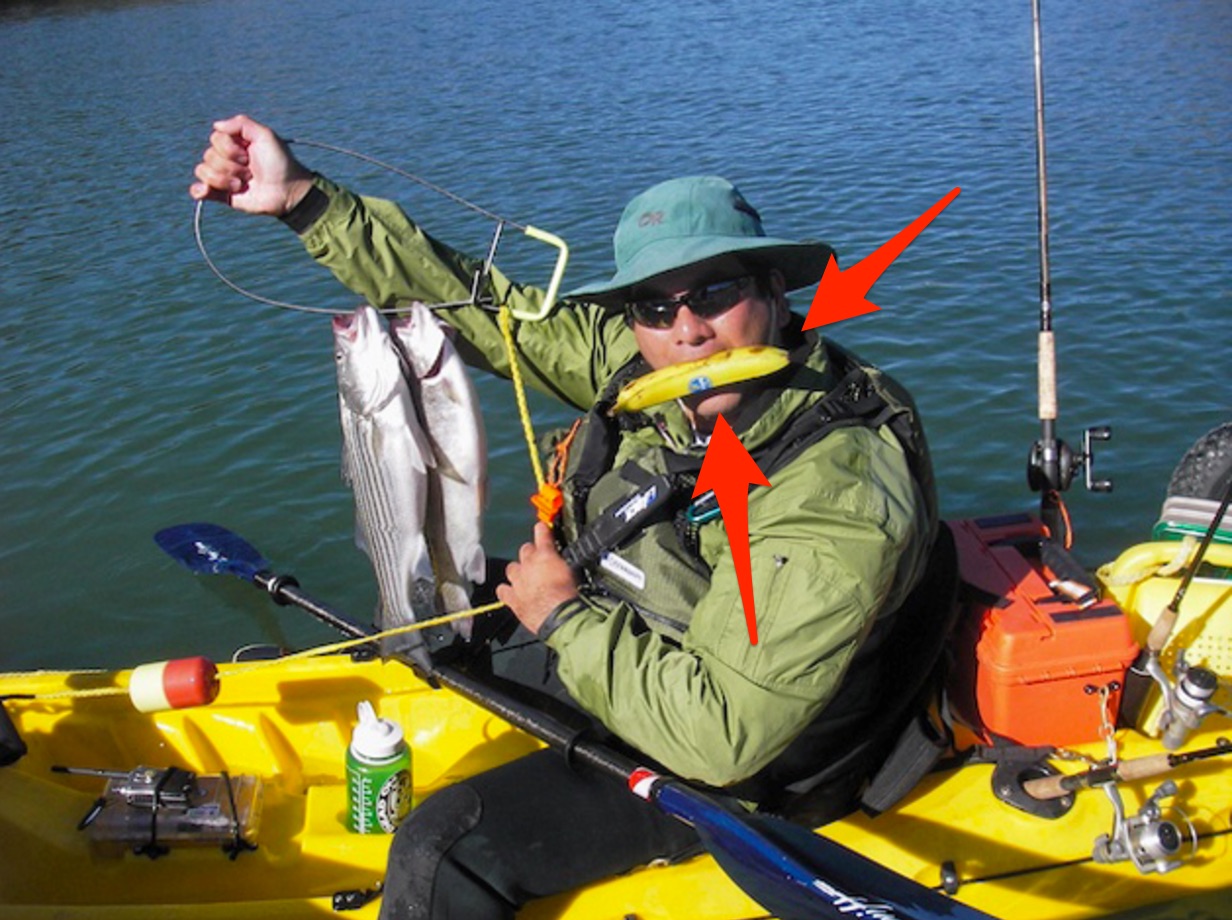
“No Bananas On Board The Kayak”
The #1 Rule on any fishing vessel is to not carry around bananas.
And just because you see this kayak angler above with a banana in his mouth while holding some stripers, what you don’t see is all of the bad luck he had afterward… just kidding, I don’t know anything about this guy’s trip.
But why take a chance with bad luck bananas on board your kayak?
It’s just not worth the risk!
Especially if you are kayak fishing by yourself.
If you need to know more about why bananas are considered bad luck while fishing, click here to see the top blog on bad luck bananas.
If you only take one thing away from this blog post, please let it be this safety piece.
If you don’t have a safe trip while out kayak fishing, then all of the other tips in this blog are somewhat irrelevant… and who cares about catching a fish if you have a serious safety issue.
To prevent and prepare for any emergency problem while kayak fishing, here is a comprehensive list of everything top kayak anglers have listed as must have on board your kayak:
Life Vest (aka PFD, aka Personal Flotational Device): In some states, wearing a PFD while kayak fishing is mandatory (and it should be everywhere). Regardless of how great of a swimmer you are, emergencies do happen, and everyone should wear a PFD while kayak fishing (especially if fishing alone).
Cutting tool (to cut line if it gets wrapped around you, to cut anchor line if there is an emergency, etc.)
Small first aid kit (you will be surprised how many different ways there are to puncture your skin while out fishing)
And the best advice… don’t ever go kayak fishing alone when you first start out. Go with a friend or find someone with some experience that doesn’t mind if you tag along.
Finally, ALWAYS give a loved one your “Float Plan” (aka exactly where you plan on fishing, where you are launching your yak, how far you will be going, and how long you will be gone).
Saltwater Kayak Fishing Tip #10
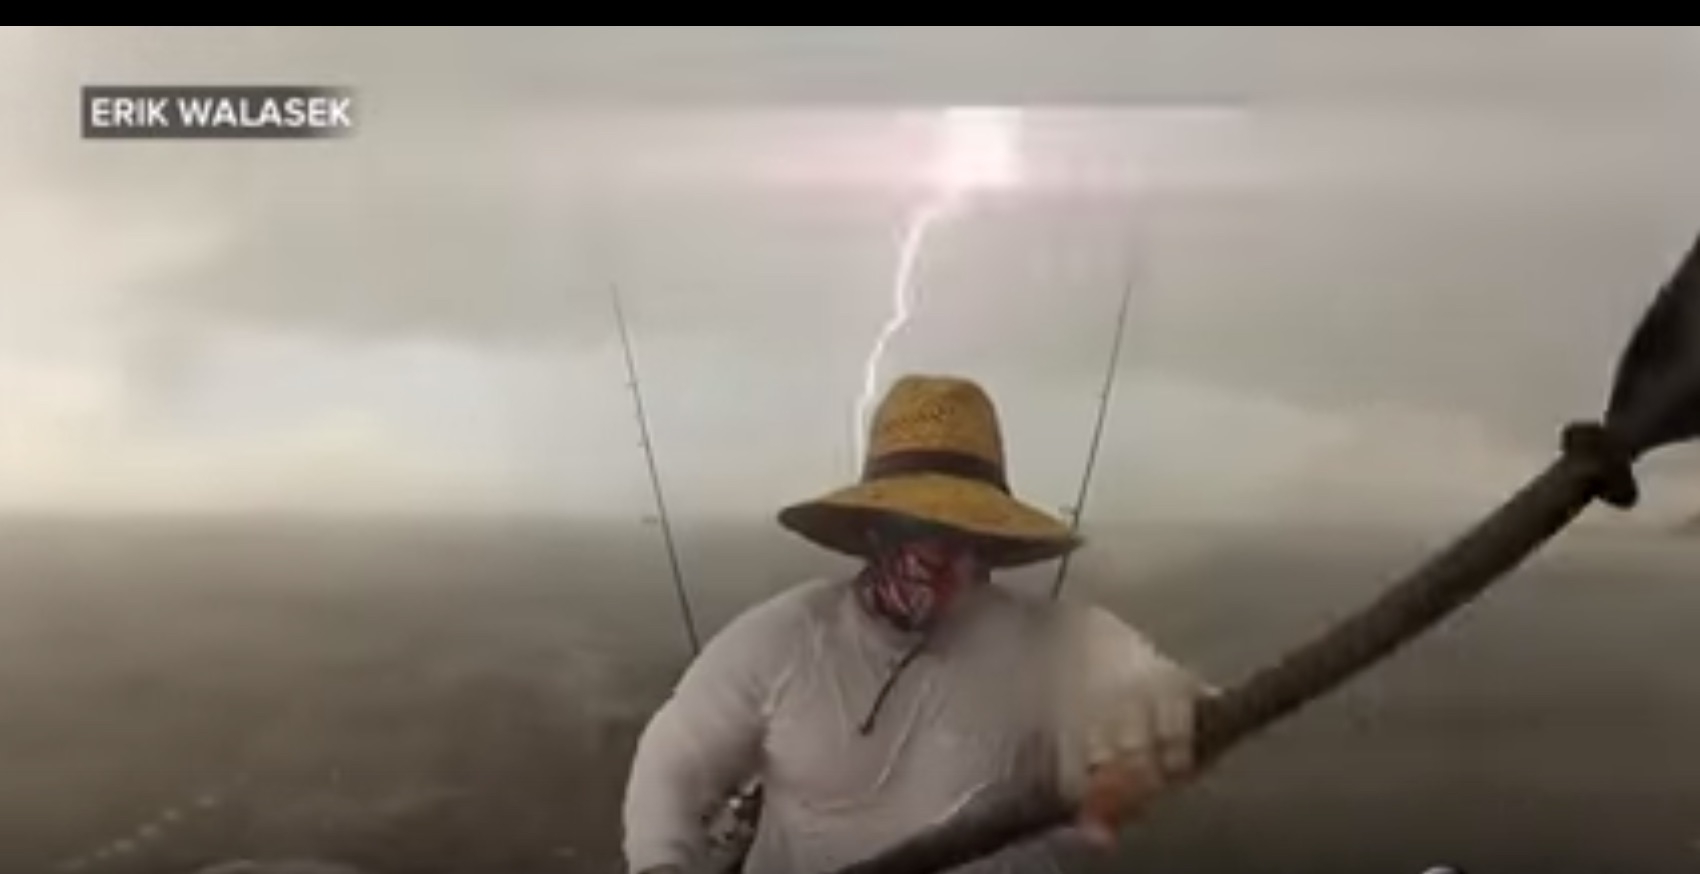
“Rain Gear”
Angler Erik Walasek getting caught in a nasty rain/lightning storm while kayak fishing
I’m not sure where you plan on kayak fishing, but if your weather is anything like Florida’s weather, you can count on some random rain (and sometimes lightning) storms coming out of nowhere.
Many of these random storms get pretty nasty.
And if you kayak fish enough, there will be a day when you get caught in some rain (or a ton of it like Erik did above).
Either way, it’s not like you are in a high powered inshore boat with a 300 horsepower engine to outrun a storm headed your way…
So when you do get caught in between a rain storm and land, you will be certainly glad you have some rain gear. It won’t fix all of your problems, but it certainly will make the ride back in to the launch more bearable.
Note: To see the wild video of Erik trying to outrun this lighting storm, click here now.
Saltwater Kayak Fishing Tip #11
“A Plan”
Earlier in the safety section, we mentioned ALWAYS having a “Float Plan”, which basically let’s a loved one know where you are fishing and what your plan is in case of an emergency (like you not showing up for dinner).
But it’s also important to point out that any good fishing trip needs a plan!
Don’t just show up to the kayak launch and make a wild guess on where you should try fishing.
Spend some time with maps (like Google or Bing), check out what the tides are doing, and even get on some forums or check out local fishing reportsto see what (and where) people are using to catch certain fish.
Moreover, have a plan on exactly what kind of fish you will be targeting.
It always shocks me when I ask someone what they are fishing for and they say, “Anything that will bite…”. And although I realize there is some humor to it, many times the anglers that say it have no idea what they are targeting.
How can you target something if you don’t know what it is, where it hangs out, and what it likes to eat!
Have a plan!
And then have a backup plan in case Plan A is a bust (because it will happen often).
If you need help targeting inshore fish like redfish, snook, and trout, I highly recommend you read “The Inshore Manifesto”.
It’s completely free and has 3 breakthroughs that any inshore angler can benefit from.
Kayak Angler Tony Acevedo with a nice redfish he caught from his yak
Saltwater kayak fishing can be incredibly fun, but just like any type of fishing, there are certain tips that can significantly increase your chances of an enjoyable trip.
Most important of them all, is taking the proper safety precautions while out on the yak.
If you fish enough from a kayak, the unexpected will eventually happen…
Whether it be a rogue rainstorm, a big fish wrapping you up and flipping you out of the kayak, or simply a hot, windy day that drains you and leaves you out of fluids, just know something will eventually happen.
Stay safe out there, have fun, wet a line and get your friends and your kids out on the water.
Did we miss any must-know saltwater kayak fishing tips?
P.S. – If you think your angler friends or fishing networks would enjoy seeing this, please Tag them or Share this with them. It would mean a lot to me. Fish On!