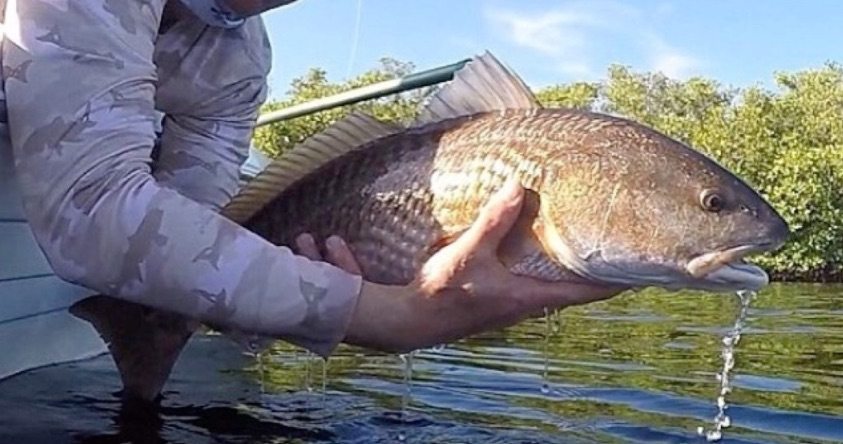
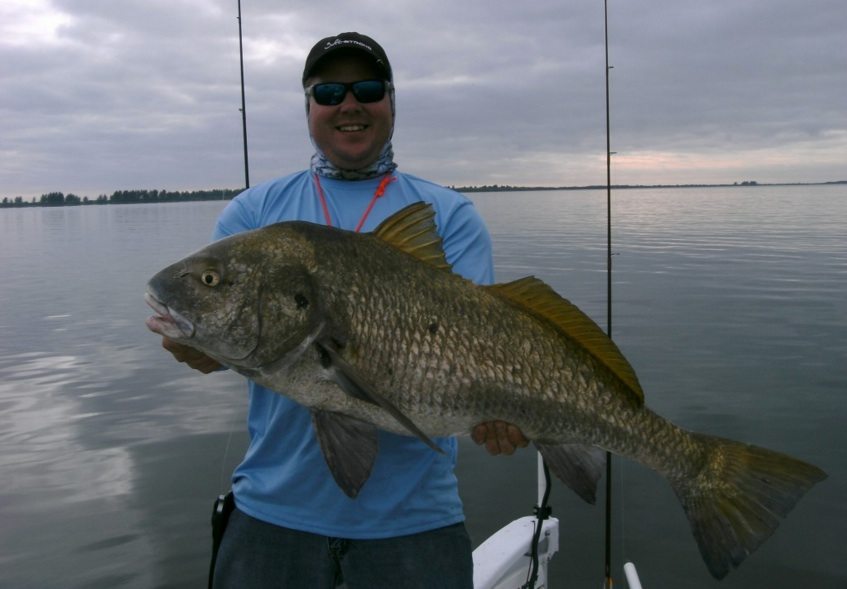
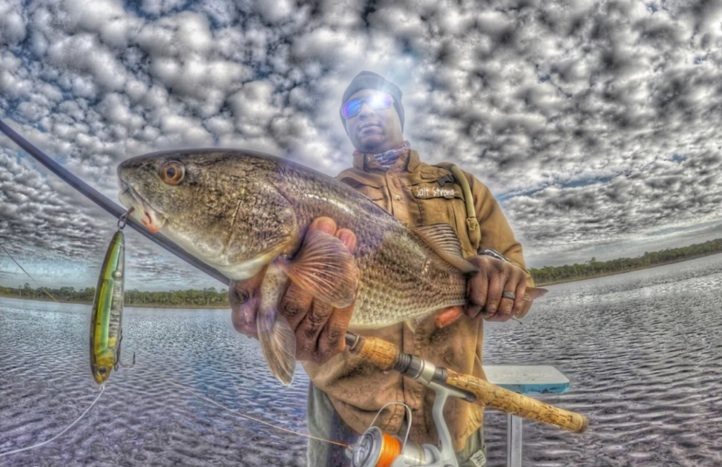
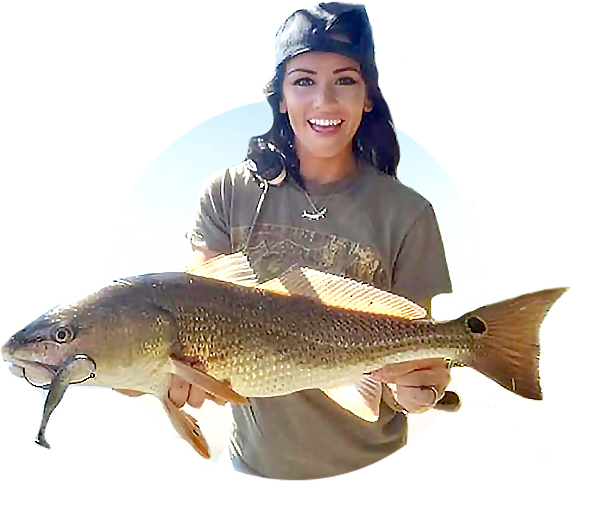
Image: Capt. Justin Napior safely releasing a nice redfish
Are you “CPR certified” when it comes to fishing…

Either way, this post will reveal everything you need to know about CPR (catch, photo, release) fishing.
But first, let’s discuss why proper catch and release is so critical today.
To begin, fishing is more than “just fishing” for most of us anglers.
It’s a lifestyle that we want to enjoy forever…
And it’s a passion that we want to pass down to the next generation.
So it’s on us anglers to consistently do our very best to preserve our favorite past time by being good stewards of our fisheries.
And a big part of preserving our fisheries is making sure anything we throw back has the best chance of survival.
So if you want to have your kids, grandkids, and great-grandkids to have the same fishing experiences you did, we need more fish being properly cared for prior to release so they can thrive once back in the water.
Further, it’s our job to help teach others who are new to fishing the proper way to handle fish so that they properly practice catch and release fishing too.
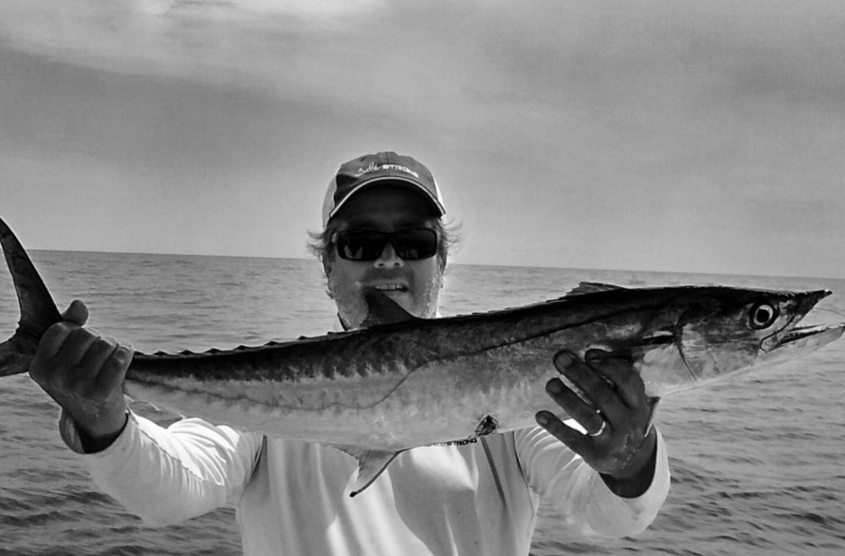
And for those of us who enjoy sharing pictures of fish with friends and family, it’s very important to display catch and release practices in pictures even if the fish will be a guest at the dinner table because those who are new to fishing will see proper holding positions.

This article will cover the top 5 features of fish that we must always do our very best to protect.
And we’ll also cover best practices for getting the perfect picture to be able to share the catch with friends and family without causing harm to the fish.
5 Essential Parts Of The Fish To Protect
The following five parts of the fish are what we much focus our attention towards when handling a fish that is going to be released.
Because if any of them get compromised, they’ll have a hard time surviving after release.
1. Gills
It is absolutely essential to make every effort to not touch or harm a fish’s gills when handling it.
Why?
Because harm done to these important tissues can result in a quick death for the fish because all fish rely on their gills to breathe.
Things to Do
- Use in-line circle hooks with fishing with live or cut bait because they are much less likely to gill or gut hook a fish
- Always be attentive to the rod when fishing so that to feel for strikes so that you can set the hook before it’s too deep
- Make sure that you keep your fingers and tools from touching the gills when unhooking a fish
Things to Not Do
- Never hold a fish by the gills
- Never stick pliers (or fingers) in through the gills to access a deep hook… just cut the line because the hook will rust out
- Don’t wait too long before setting the hook after feeling a bite
2. Skin
Although the fish’s skin doesn’t seem to get as much focus in terms of things to protect, it surely shouldn’t be overlooked.
Especially as more and more chemicals from stormwater runoff enters our fisheries…
Why?
Because their skin is their core defense against harmful bacteria, parasites, and/or chemicals that are in the water.
And any loss to their “slime” on the outer layer or to their scales can put them at risk of a slow death from getting infected or poisoned.
Things to Do
- Pre-wet everything that will touch the first before it touches the fish (dip hands in water, splash water on deck of boat/kayak, dip landing net all the way into the water before netting the fish, etc.)
- Make sure to have all needed items for holding, taking a picture, and unhooking a fish in close proximity so it’s all easily and quickly accessible allowing for a smooth and quick release.
- Use a fish grip to secure the head of the fish so that you can minimize the needed touch area of the fish (and so it doesn’t slide around you or the boat if it continues fighting.
Note: If using a landing net, make sure it has a rubber lining on its netting (NO rope webbing)
Things to Not Do
- NEVER use a cloth rag to grab ahold of the fish that is going to be released
- Don’t bring a fish that you’re going to release in too quickly… better to spend more time reviving at the end than bringing an uncontrollable fish into a boat/kayak or onto the beach where it can lose lots of slime coating.
- Don’t rub a fish against dry clothing when taking a picture… get help from someone else if unable to hold the fish with just two hands or get in the water for a really cool pic.
3. Jaw
A fish with an injured jaw will have a very tough time capturing its food.
And although a fish with an injured jaw may very well swim away energetically when released, an injury to its jaw could result in the fish being unable to feed making it unable to survive.
Things to Do
- Use extreme care to not force the entire weight of a big fish by its jaw
- Take out hooks with the fish’s body either in the water or securely resting on a wet surface on your boat/kayak/etc.
- Use a fish grip to securely hold onto the jaw so your other hand can more easily be used to support its midsection
Things to Not Do
- Don’t hold a big fish vertically by the jaw
- NEVER torque the jaw in an effort to horizontally hold a fish by its jaw
- Don’t use barbed hooks (especially treble hooks) while catch and release fishing (push down barbs with pliers and replace treble hooks with single hooks on lures that come with treble hooks).
4. Internal Organs
Fish are designed to thrive underwater in a mostly horizontal position, and their internal organs are set up to help them thrive in that same environment.
So the internal organs of some species can get compromised when they are held vertically when out of the water since they simply were not designed to withstand gravity in that position (especially the bigger/older fish).
Things to Do
- Take care to not hold fish in the air vertically
- Use two hands to pick up a large fish so that you can support its mid-section
Things to Not Do
- NEVER hold a large fish up in the air vertically by its jaw (it can harm both its jaw and internal organs)
- Do not squeeze a fish with a lot of force in order to keep it securely held since that can cause damage to internal organs too.
5. Eyes
Fish heavily rely on sight to feed and stay out of trouble, so we always need to be very mindful to not damage their eyes in any way.
Things to Do
- Take care to not allow anything sharp or rough to tough/scrape their eyes
Things to Not Do
- NEVER hold a fish that is going to be released by its eye sockets
How To Take Great Pictures Of Your Catch
Capturing a great picture of a great catch is can be almost as rewarding as the catch itself…
Not only will it enable you to relive the awesome experience for many years to come from just looking at the picture, but it also can be a tremendous tool to help you share the joy of your catch with any friends and family members who weren’t fortunate enough to have been there to see the catch firsthand.
Plus, a great picture will ensure that there are no skeptics to your story of the big catch:)

Photo Taking Tips If Fishing With Others
Nothing is worse than having the best catch of your life not captured on film due to photographer error…
So if you’re going to be fishing with friends, make sure to have your camera in an easy to find location… and be ready to give specific directions to a friend on exactly how to use your camera if they don’t have a camera of their own.
Here are some general things to keep in mind when taking fish pics:
- Make sure that you and/or your fish are facing into the sun/light so that all colors are as clear and bright as possible
- Have your friend check the background to include or exclude items as needed (secret fishing location, even horizon, etc.)
- Take multiple pics in case any eyes were closed
Also, it also can be fun to get creative with angles to make a catch look better than it otherwise would…
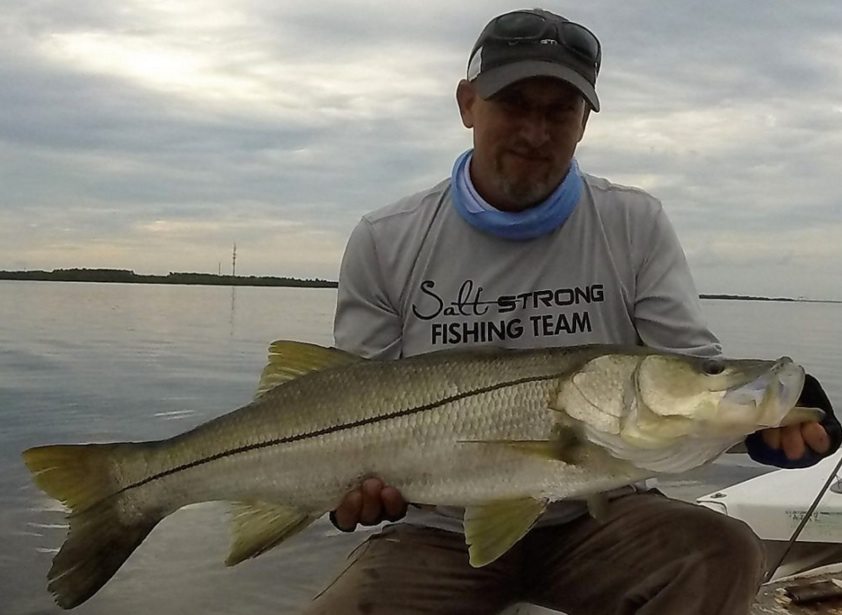
For example, here’s a picture of a really small snook that I typically would not even consider taking a picture with. But I was fishing with a great photographer who was able to turn the not so great catch into an awesome photo.
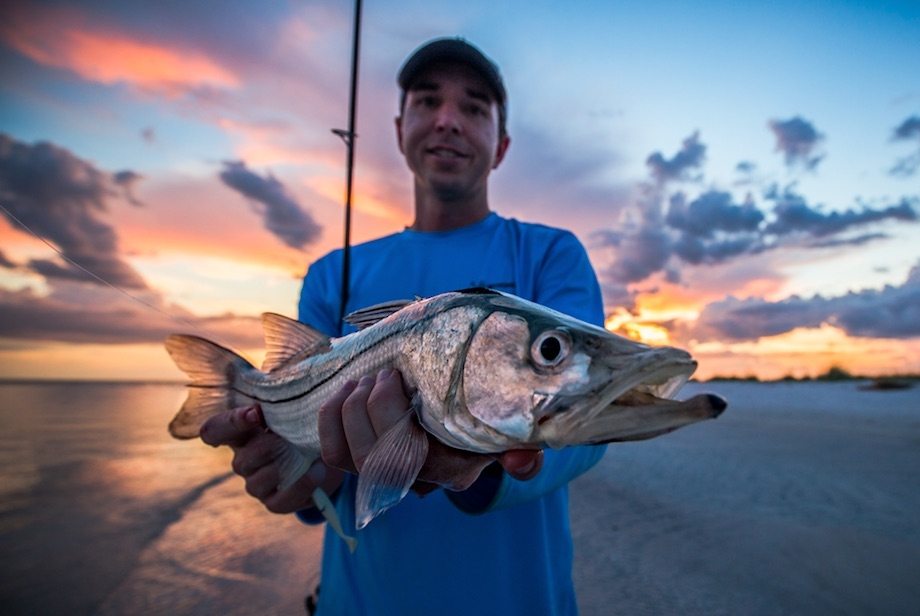
Photo Taking Tips If Fishing Alone
Now that cameras are so small and user-friendly, it’s now fairly easy for you to be able to take excellent pictures of you with your catch without the help of anyone else…
It just takes some planning…
First, get to learn what features your camera has for taking delayed pictures or video footage.
Note: If your camera takes crisp video, then you’ll be able to pull the exact perfectly timed image from the video feed.
Secondly, plan what sort of angle you want to capture and then make sure to set up some way to safely hold your camera in the right spot so that it can capture the image without getting lost.
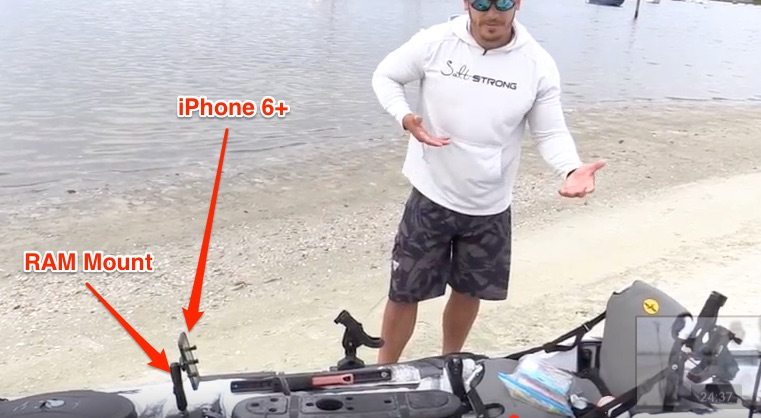
For example, here’s the very basic setup that Tony Acevedo uses to take his awesome pictures while fishing alone from a kayak.
Finally, make sure to store your camera in an easily accessible location so that you can efficiently get it when the need arises.
Note: I recommend practicing a few times before on the water to make sure to get any bugs or inefficiencies out on dry land before it gets more difficult on the water.

Catch, Photo, and Release Fishing Equipment
Here’s a list of fishing equipment that can be extremely beneficial to catch and release fishing.
Fish grips – These tools grip on to a fishes jaw and do not let go until you want it to so that you can ensure the fish can’t accidentally get dropped while also decreasing the amount of area that is needed to touch a fish.
Needle-Nose Pliers: These are essential to have while fishing because they allow you to efficiently unhook a fish even if it’s hooked fairly deep and has a small mouth.
De-hooker: This is another essential tool that can help you more unhook a fish with minimal contact to the fish.
Waterproof phone case: Since phones these days have such nice cameras (amazingly nice in some instances), a waterproof phone case can help ensure that your camera doesn’t get ruined by getting wet (I’m sad to report that I learned the importance of a good waterproof case hard way).
Camera Mount: If you fish along and want to get great pics of your catches, then it is wise to get a camera mount so that you can safely and efficiently take pictures of you and your catch. Click here to see some awesome pictures that our kayak instructor Tony Acevedo has taken.
Ventilation Device (offshore): If offshore fishing, make sure that you’re ready to assist you fish with swim bladder issues back down to the bottom… watch the video in this linked post to learn more about ventilation best practices.
Conclusion
Since fishing is more than just fishing, we need to do all that we can to help ensure that our fisheries are as well cared for as possible.
So we need to consistently implement catch and release best practices to ensure that the fish we release can thrive.
And just as importantly, we need to display those best practices so that those who are less experienced can see the proper way to care for fish.
Furthermore, it’s on us to share proper catch and release practices with others who haven’t been informed of the potential deadly harm they can be unknowingly doing to their beloved catches.
Message to the “Fish Police”
Please be kind and courteous to those who post pictures in social media with poorly held fish…
Because 99% of the time, they have no idea that they could be causing harm to their catch… if they did, they most certainly wouldn’t be posting pictures of themselves harming fish online for all to see and scold them for.
When not 100% certain of bad intentions, go with the honest mistake assumption because it’s most likely going to be right… name calling and public shaming makes the entire fishing community look bad.
We’re all in it together, so let’s continually focus on pulling anglers up vs. pushing them down.
How To Kindly Inform Others:
Help spread the best practices for catch, photo, and release fishing when you see that there is a need.
If it’s an online post, then perhaps kindly send them a link to this article (or any others that you feel are helpful) and simply say that it has some valuable tips at efficiently practicing catch, photo, and release fishing.
P.S. – If you think your angler friends or fishing networks would like to see this to help spread the cause, then please Tag them or Share this with them. You Rock! Pa-POW!
Related Posts:
- Must Know Catch and Release Fishing Tips For Saltwater Anglers
- An Open Letter to PETA On Catch & Release Fishing
- 3 Super Easy Tips To Help Capture More Amazing Fishing Moments On Film
Final Note: If there are any inaccuracies in this post or other important things to consider when handling a fish that is to be released, then kindly use the comment section below to play a part in helping us all better care for our beloved fisheries… I’ll gladly make any needed adjustments to it at any time so that it’s as helpful as possible.
In the meantime, let’s see more fish being released as healthy and strong as they were prior to being caught.


Thanks for the C&R Bible Chapter 1: Verse 1. Amen.
My question pertains to tonic immobility. Sharks have been videoed becoming ‘paralyzed’ when flipped on to the their back and I wondered if this is true for -all- fish. If so it would seem to be the best way to control a landed fish to remove hooks or lures.
THANKS FOR THE REMINDER OF HOW TO HOLD FISH AND WHAT TO DO TO KEEP THE FISH ALIVE.
I would say I am CPR certified. I use fish grips on all my bigger fish, but if they thrash, specs, then the fish grip tear a hole in their bottom jaw. I am convinced that using fish grips help me handle the fish. But I would love to see a better option that does not tear a hole in their lower jaw.
Open to ideas…thanks
CPR, awesome how it is also used to save a fish’s life.
Luke, thank you. I’ll save this one for sharing via DM.
Great info and reminders!
Great tips. I constantly see captains, TV fishing shows where they always hold small snook by the lip and hold it vertically. I saw it said don’t hold large fish like this. But has there ben studies on effects of holding small fish vertically? Wouldn’t it be true that there Jaws aren’t as strong as the bigger fish? Therefore still risk injury by holding them vertically ? Thanks
Researchers in Australia found the damage to big fish is greater. It’s the cube power law: weight increases as the cube of length, but ligament diameter increases only as the square of length.
I’m glad to see more info on catch and release. It is becoming increasingly important as our fisheries are stressed by our environment. Jolly good show!
Great information. I have learned I was making some mistakes especially with taking pictures of my catches prior to release. I now know better.
Glad to see that you enjoyed this article. Please make sure to pass it along to anyone else that you think could benefit from it.