This post will show you the absolute fastest and easiest way to tie the “FG knot”, and we even have a free PDF guide for you to download too.
The FG knot is a relatively new braid to mono (or fluoro) knot that has proven to be stronger and thinner than all other braid to leader knots we’ve tested.

I have been a huge fan of the FG knot ever since it shocked me in my first braid to leader knot contest because it proved to be over 30% stronger than all of my prior favorite knots including:
- Double Uni
- Crazy Alberto
- Albright
- Bimini Twist with Bristol finish
And it also happens much thinner than all of the other braid to leader knots because the thicker leader line never doubles over like it does for traditional fishing knots.
The FG Knot Complaint
The most common complaint against the FG knot that I’ve heard is that it takes to long to tie…
And I’ll completely agree with that concern if it is being tied the traditional way by manually wrapping the braid around the mono.
However, there is a much faster and better way to tie the FG knot that allows it all to be completed in under 60 seconds (video proof below).
How To Tie The FG Knot [Quickly]
The absolute best and fastest way to tie the FG knot is to thread the leader onto the braid while the braid is under tension.
There are several ways to tie the FG with tension, and the first two versions shown below in this post are the fastest and easiest methods I’ve used so far: Teeth Tension & Pinky Tension.
Check out the videos below to see how to these methods work.
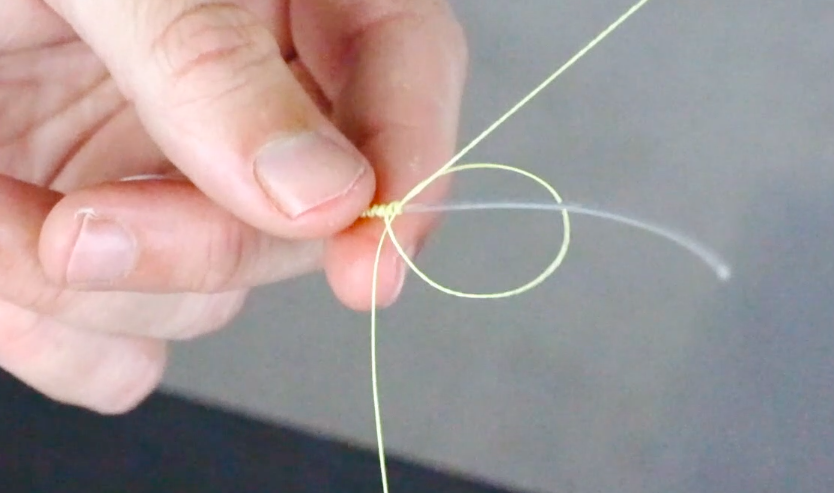
FG Knot: The Pinky Method
This pinky method has quickly become my favorite of all because it’s easy to do, and it doesn’t require holding the line in my teeth.
Free FG Knot Guide [PDF]
Click here to get a single-page cheat sheet PDF guide showing the core steps of the FG knot so you can always have it on hand if you need it… it’s 100% FREE!
FG Knot – Teeth Tension Method
Free FG Knot Guide [PDF]
And click here to see the results of all of our knot tests so you can make sure you’re using the best knot in every situation.
FG Knot Steps [Must Do All 7]
Here is a list describing the essential steps to tie the FG Knot:
Step 1: Wrap the line around your pinky or hold in your teeth
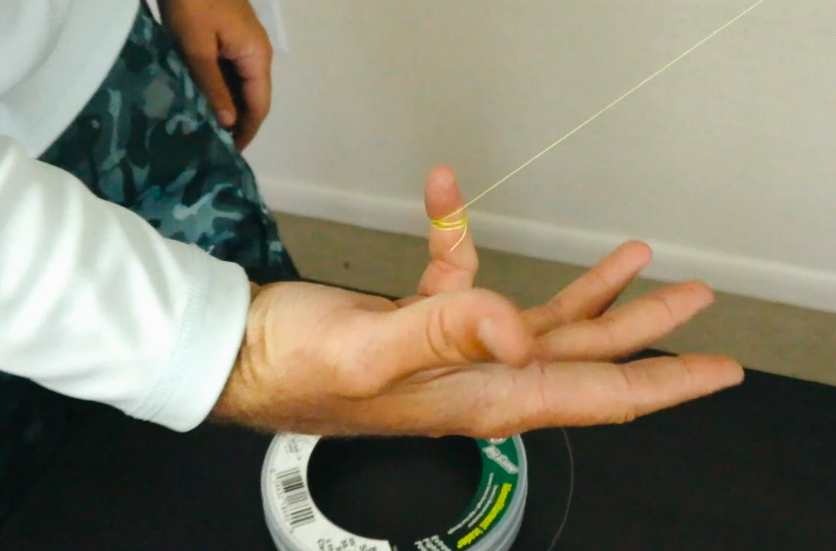
This will allow you to keep tension on the line while still having nine other fingers to tie the knot.
Step 2: Wrap the leader around the braid
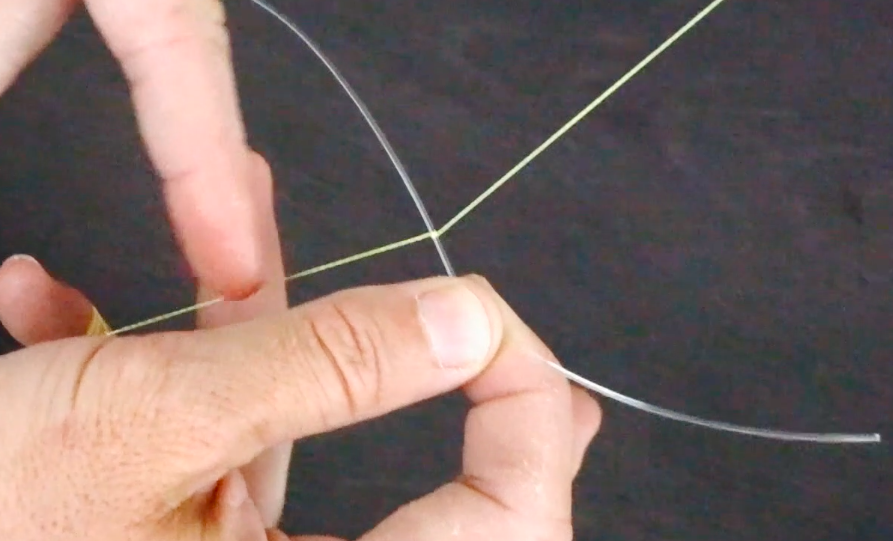
Place the leader above the braid and then wrap it over and around the braid while keeping tension on the line.
After you’ve made a wrap over the braid, then make a wrap under the braid.
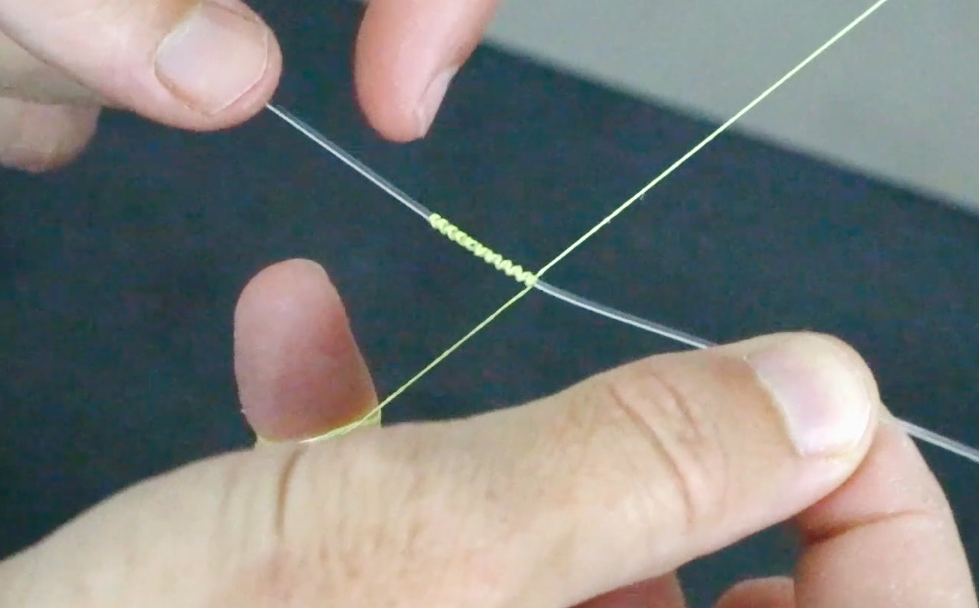
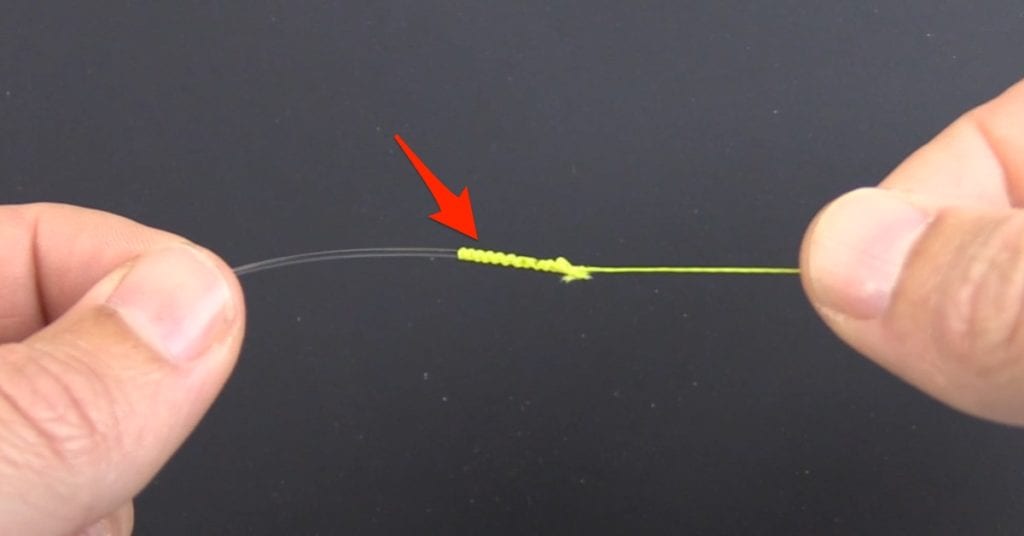
Keep alternating until you’ve made 16 wraps (I used to recommend 20-22, but 16 has worked very well for me).
After you’ve made 16 wraps, it should look like this:
Step 3: Tie two half-hitch knots to lock the coils in place
Hold the coils with your fingers to keep them in place and be sure that you’re getting both the leader and the mainline in these knots above the coils.
Step 4: Apply tension to the knot so that the braid digs into the leader

This knot is only effective if the braid digs into the leader, so once the coils are in place, wrap the braid around your hand a few times and pull on the knot to let it really sink in.
As you’re pulling on the lines, you should see that each of the coils are tightening down on the braid and staying evenly spaced out.
The first coil is the most important, so definitely be sure that that one has tightened up, otherwise you risk this knot coming undone, especially if you’re casting through guides.
Step 5: Cut the tag end of the leader off
You can cut the tag end off really close to the knot because once it’s locked in, it’s not going anywhere.
However, be sure that you cut the tag end off AFTER you’ve put tension on the knot.
When you put tension on the knot, the coils will typically slide up a bit, so you don’t want to cut the tag end off before that.
Step 6: Tie two more half-hitch knots
The purpose of this step is to create a smoother top of the knot so that the hard edge of the leader’s tag end doesn’t snag onto anything (floated debris, rod guides, etc.).
Step 7: Cut off the braid tag end and start fishing!
Free FG Knot Guide [PDF]
Click here to get a single page cheat sheet PDF guide showing these core steps of the FG knot so you can always have it on hand if you need it… it’s 100% FREE!
FG Knot Mistakes
If you follow the instructions listed out earlier in this post, you’ll be able to tie the FG knot like a pro.
However, I have noticed that there are three mistakes that commonly pop up that will cause this knot to fail.
To make sure you know what these mistakes are and how to avoid them, check out the video below.
 Click here to see the best knots for every situation and download the Ultimate Knot Guide PDF
As long as you only use this knot when connecting braided line to stronger monofilament or fluorocarbon and don’t cast it through the guides, this knot will serve you well.
The FG Knot In Less Than 60 Seconds
As I mentioned above, the most common reason we’ve heard from those who watched the video above in YouTube was that it takes too long to tie.
But the tying was of course done slowly in order to explain the various steps.
So we thought it would be fun to make a video showing me tying the FG Knot without taking the time to walk through each step. And the result was an FG knot in less than 60 seconds… here is the video:
Note: this is done using the old way of putting tension on the line with your teeth… the way described above is even faster and easier!
Conclusion
Learning how to tie the FG knot in under 60 seconds is not difficult… it just requires knowing the quick method explained in this video.
And the most important part to remember is the tightening of the braid coils on the leader before cutting off the leader’s tag because that is what locks the coils in place for good.
Best of all, it will result in a knot that has tested out to be more than 20% stronger than many very popular knots for connecting a braided line to a mono/fluoro leader.
Note: The breaking test results change depending on line types used, so I highly recommend trying it out on your favorite gear and seeing if it has a higher breaking point than whichever knot you’re using to see if it’s worth the switch.
P.S. – If you think your angler friends or fishing networks would like to see this, please TAG them or SHARE this with them. It would mean a lot to me.
Related articles:


Been wanting to learn the FG knot for a while. So many methods all of which seemed…and felt…cumbersome. Sat down tonite with the little finger method and in 4 tries was able to tie in under 60 secs. Awesome method and knot. Thanks
Thanks for the “pinky finger” FG method video. I tie the FG knot as you show in you video but instead of using my pinky finger for tension, I use the rod and reel. I tie a loop in the braid and slip it over the handle of the rod. Then I turn the reel handle pulling the braid and flexing the rod to put some tension on the braid. Then proceed to weave the knot as you show. The trick here is pulling the leader end of the mono as you weave the knot so that the braid coils are evenly spaced on the mono and not on top of each other. Then cut the rod handle end of the braid leaving enough line to finish the knot as you show. (This takes a little less manual dexterity but a little more time. I don’t change the reel drag setup.)
Thanks for sharing the helpful tips Chuck.
I struggled with this knot. Was using a flouro but switched to a larger weight mono and that seems to have fixed it. My guess is that it gives more surface to grab onto and squeeze. Thanks for the tips,,
The Albright was my favorite until I learned the FG. Still use both, but find the FG used for most these days. I like the Albright when I am using live bait in rocky bases, as I worry the FG may get its first wrap nicked and lose the knot. Have you ever done an FG/Albright/Uni test through various substrates to simulate when bait gets under shellrock, sticks, or around other structures? Maybe overthinking, but hey, it’s another great video you can make and help us learn more about the truth of what’s happening down there.
That’s a cool idea! Thanks for making time to post the experiment suggestion. I have not done that type of experiment before. At first thought, it will be tough to do it in a way that produces an accurate result… I’ll contemplate how to make it as fair as possible.
As for my hypothesis, I don’t believe that there is much risk to worry about the first coil of the FG knot getting worn through from abrasion because it should be dug into the leader fairly well… the mainline would most likely get compromised first as evidenced by the fact that I have not yet seen an FG failure in my many years of dock fishing due to the last coil getting worn through despite having many battles end up with line rubbing up against pilings.
Also; I saw a guy use rope & an eye bolt to illustrate how to tie a loop knot. Just an idea for the future 😎
Thank you!! I’ve had one other person show me the “old school” way of tying this & I felt the same if it being to tedious. I will def use this now
saw this online for yet another way to tie FG knot. I still like Luke’s method, but thought you might like to evaluate. https://www.youtube.com/watch?v=vQ2qpqH3YVI
That is definitely not the FG knot… it’s more like a bimini twist that only has 1 leg. I would not trust this knot to hold given that the mainline coils are on the top layer which will not allow them to dig in as efficiently as they do on a proper FG knot.
that’s what I was thinking. There is no weaving. It looks like a proper FG but as you said, no alternating weaves. It looks easier, but as you also say, tying the FG with your method is not hard at all after a minimal amount of practice. Thanks, (Just wanting confirmation).
I haven’t been able to find anyone demonstrating the FG knot on thin line. I use 10lb braid to 6 lb fluorocarbon and have a really hard time keeping the loops lined up.
The FG knot is designed to protect a lighter braid against a stronger leader. A 6 lb fluoro line is surely too thin for the FG knot. For those lines, I’d go with a blood knot (8 turns on both sides).
This is the only way I have learned to tie this knot! It’s pretty easy once you get it! Thanks, Luke!
Can this work with fly line to leader connection? Or is the fly line material too thick to compress the coils like you suggest?
I don’t know if the FG will work on fly material or not… I wouldn’t use it out of fear that the outer core of the fly line could give out (the Nail knot is a popular knot for that connection).